How to integrate Salesforce to Radarr by Genesys?
With Salesforce integration with your Radarr instance, you can sync tickets between Radarr by Genesys and Salesforce and easily respond to these tickets. Follow the following steps to easily create the integration.
Step 1: Purchase the Radarr by Genesys app on AppFoundry

Step 2: Once you have purchased and installed it, you will find that the option for Salesforce integration is already enabled for all Radarr AppFoundry customers.
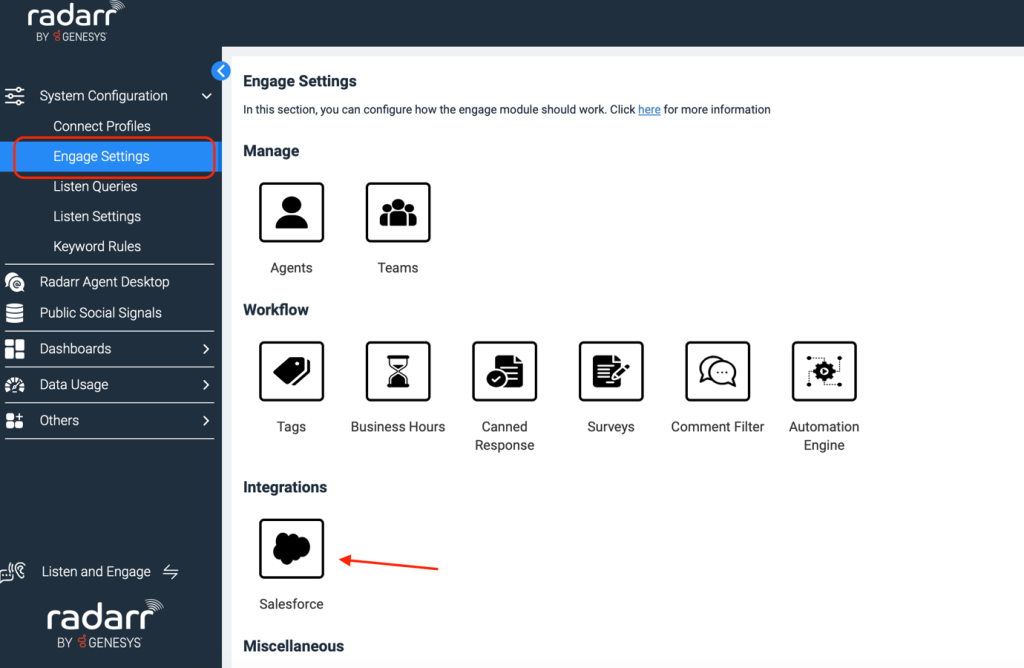
Step 3: Locate the system configuration widget of the Radarr by Genesys app. There, you will see Engage settings. On clicking that – you will see a section for Salesforce Integration.
Step 4: On clicking that, you will see a tab called – “Download code”. Click on the URL shown below to download the code files (classes, triggers, mappings) using that URL. You will have to deploy these codes in your Salesforce instance. The provided code serves as a template and can be tailored to accommodate your specific requirements. Please keep in mind you can change the code but you cannot change the fields.

Step 5:
There are a few things you will need while deploying the code. In the provided code sample, we are using HTTP Callout. Hence you will have to create named credential using the following information
Name: Radarr_Webhook
URL: https://prod-integration.radarr.com/v4/salesforce
Username/password : Will be provided separately. Please contact cssradarrsupport@genesys.com for the credentials.

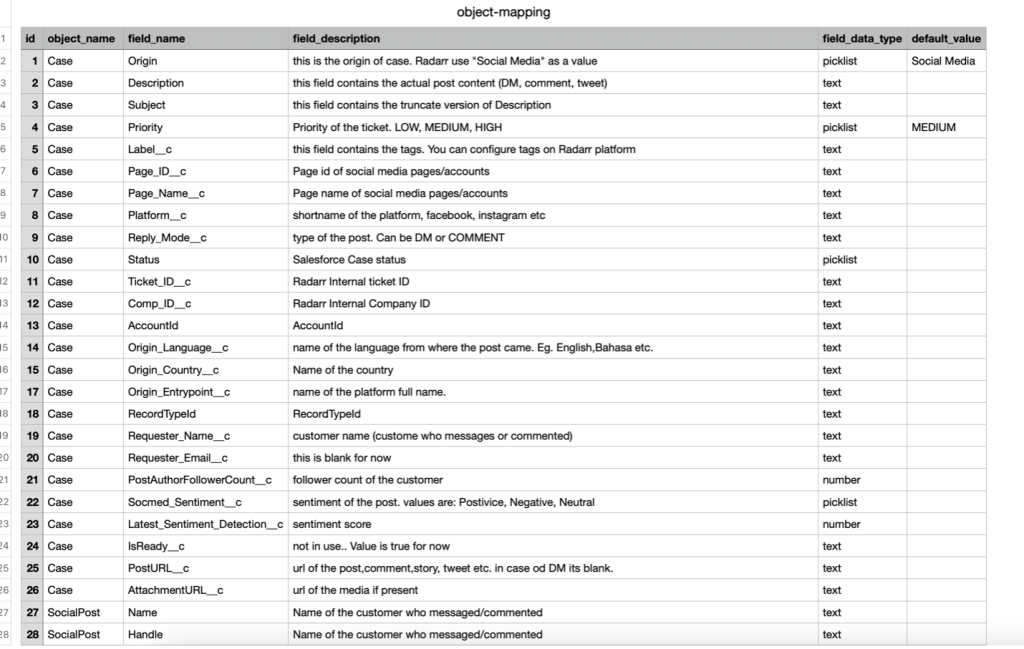
In the downloaded file, you will find an “object-mapping.csv” file. It is mandatory to configure all the custom fields.
For the custom fields ending with _c like Label_c, please follow the instruction for field data type as mentioned in the CSV file. For other fields, you may tweak their picklist values. For eg. Origin fields should have “Social Media” as a value.
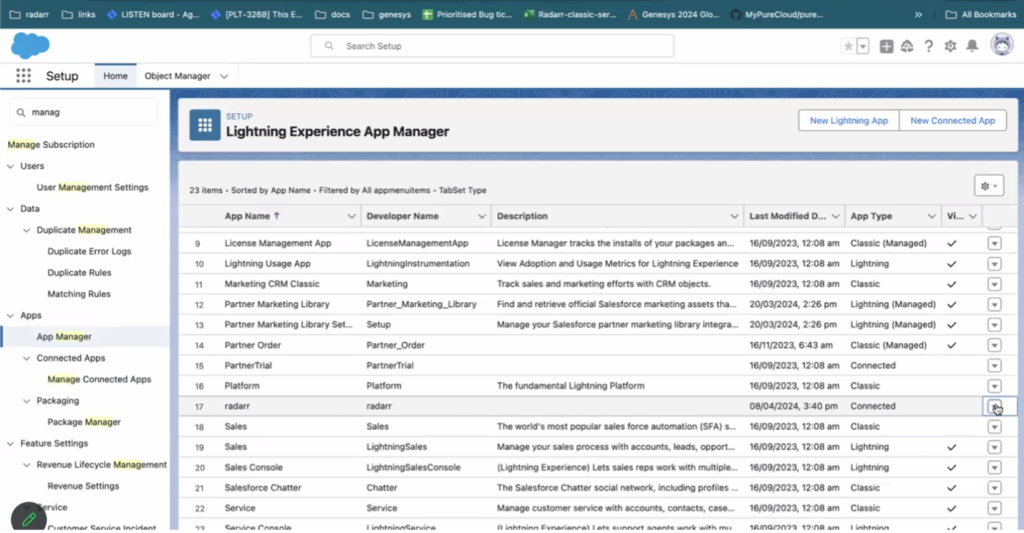
Step 6: Create a connected app on Salesforce by navigating to setup/platform-tools/apps/app-manager.
Add the following Callback URLs and scopes as highlighted in the image below
Callback URL –
https://appfoundry.radarr.com/social-tokens/oauth-callback-social
Scopes –
manage user data via api
perform request at any time, refresh token
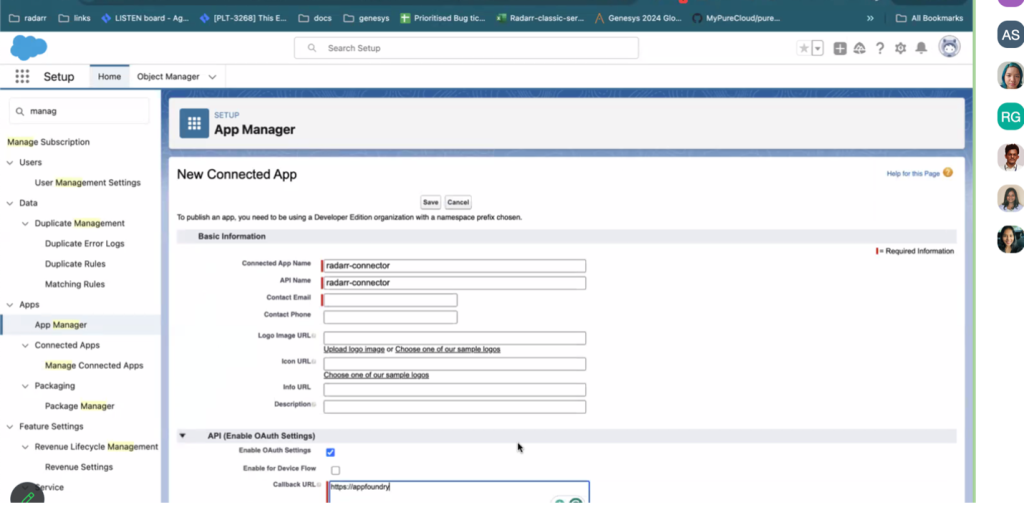
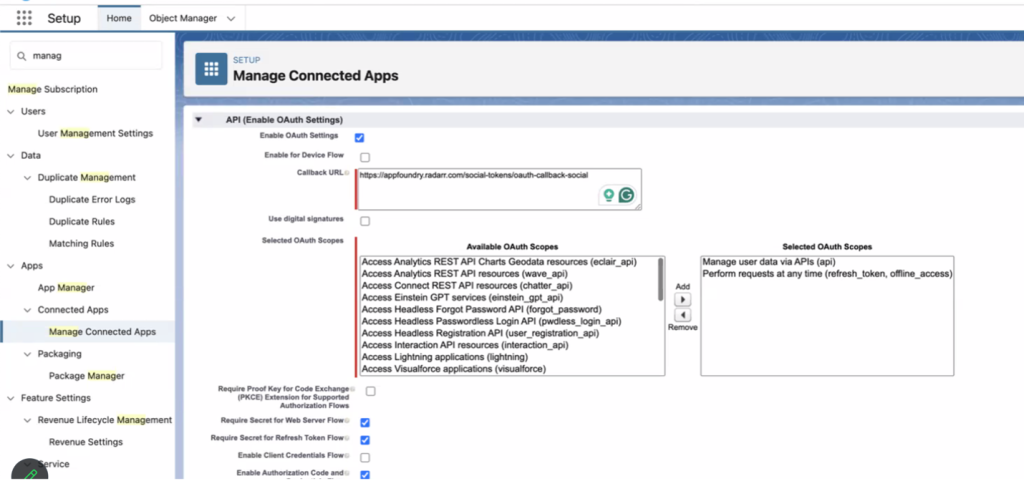
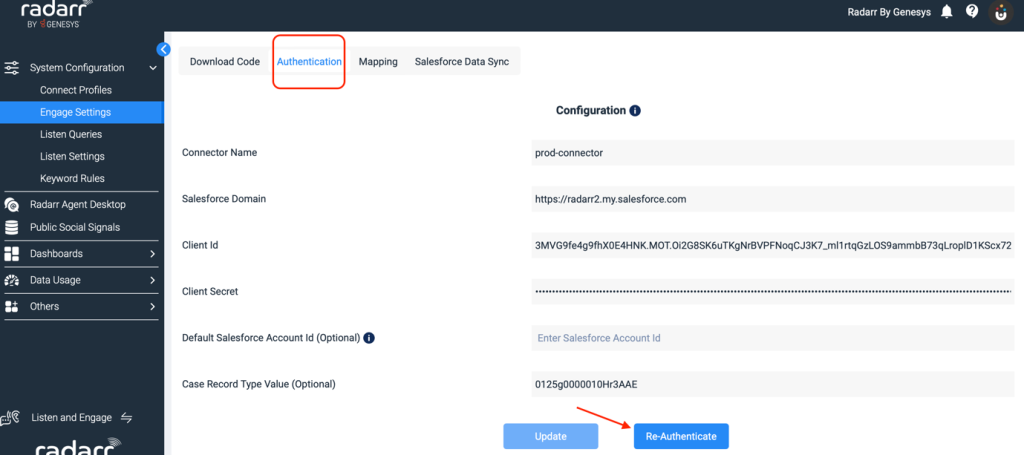
Step 7: Once the connected app is created, go to the Radarr app – fill in the connected app details and save it. After saving it click on the “Authenticate” button. At this point, we would have stored the access token and refresh token needed to make an API call to the Salesforce instance
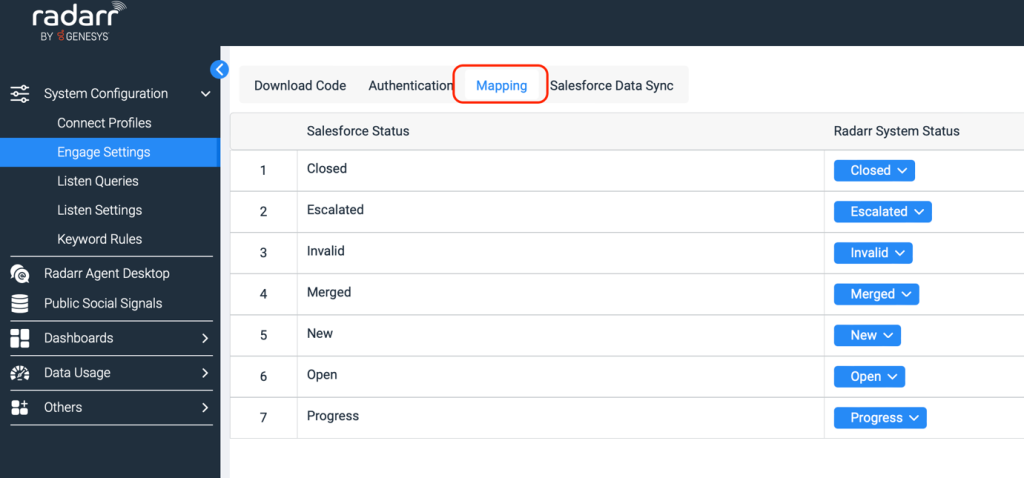
Step 8: Configure the mapping. The system will automatically populate all the statuses available on your Salesforce Instance. Now you can map the ticket status available on Salesforce with what you think is the appropriate equivalent status on Radarr. This is needed because the Radarr Ticketing system works on the Radarr Status. Once this mapping is completed, when you add a status to any of the Salesforce tickets, its mapped equivalent will appear on Radarr.
Step 9: Now connect your social media pages to the Radarr by Genesys platform. Please note that you need to have admin access to the pages that you are trying to connect. For connecting the pages, locate the “Connect profile” widget under “System Configuration”. After that, click on the icon of the social media platform of the page you are trying to connect and you will be able to connect the page.

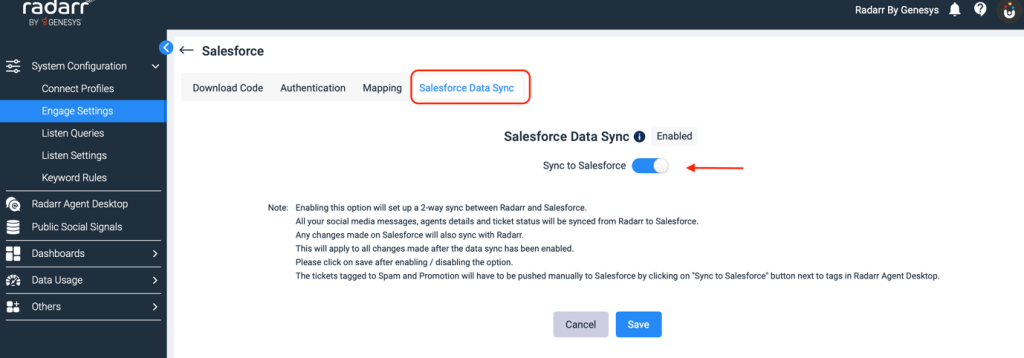
Step 10: Finally, enable the Sync and save it. Once you have enabled it, messages should start flowing into the Salesforce instance
