Getting started with Engage
Part 1: Configurations
Engage section will enable you to respond to your audience from within the Radarr app on Genesys Cloud.
To get started, navigate to System Configuration -> Connect Profiles -> platforms

Click on the platform icons you would like to configure. For example, if you would like to authenticate your Facebook account -> click on the Facebook icon and sign in to your Facebook account to authenticate. Before moving on, double-check that only the pages or accounts you want to connect with Radarr by Genesys are selected. If any other pages or accounts are pre-selected, deselect them before proceeding to the next step.
Please note that only three profiles can be connected per account for the Radarr by Genesys Appfoundry trial. For paid subscriptions, please refer to the SKUs purchased by your company.
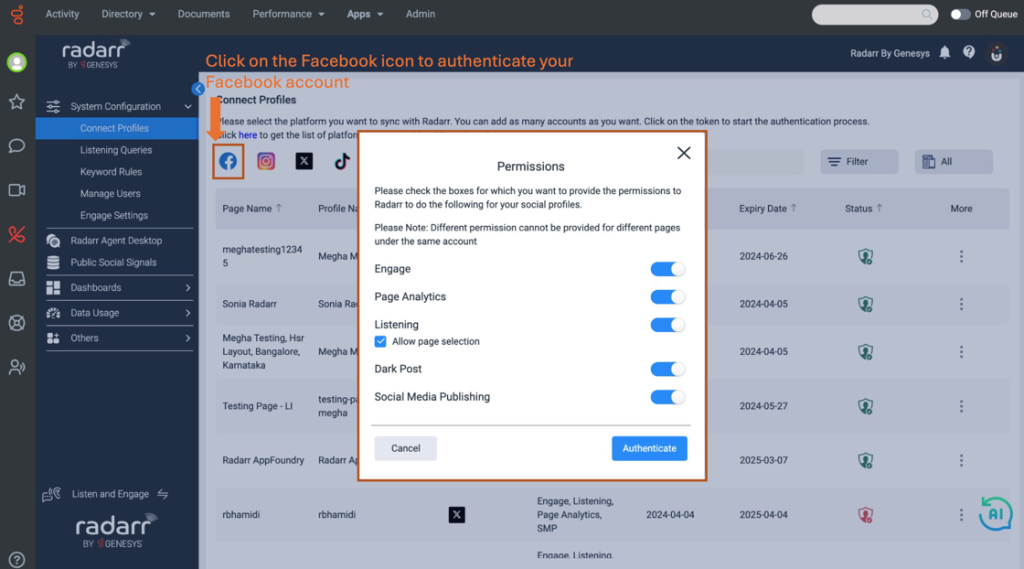
Please refer to this article for the The Complete Guide to Authenticating your Social Media and Online Accounts in Radarr by Genesys.
Once you have connected your profiles you can navigate to -> Engage Settings
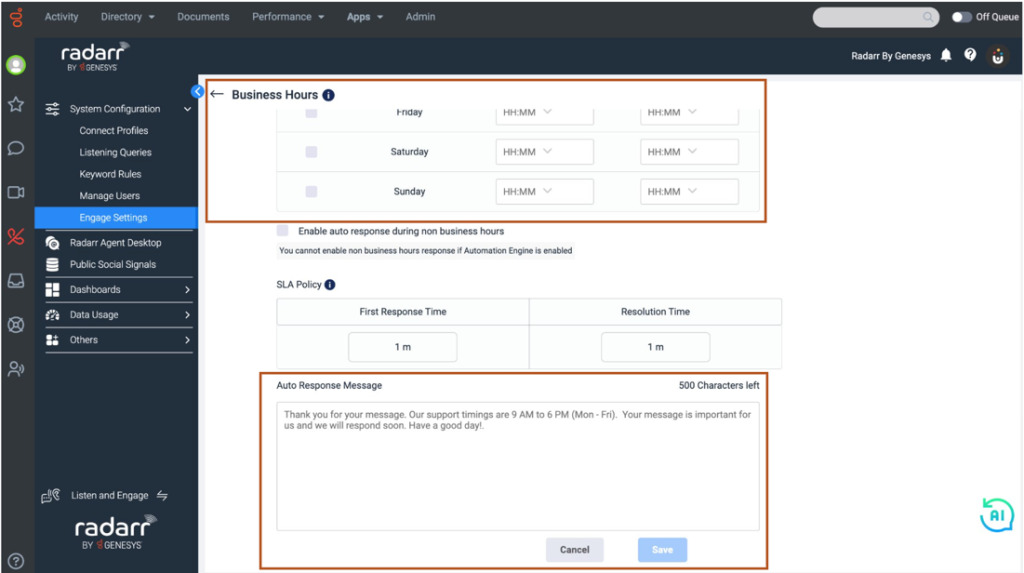
Only admins will have access to Engage settings and system configurations
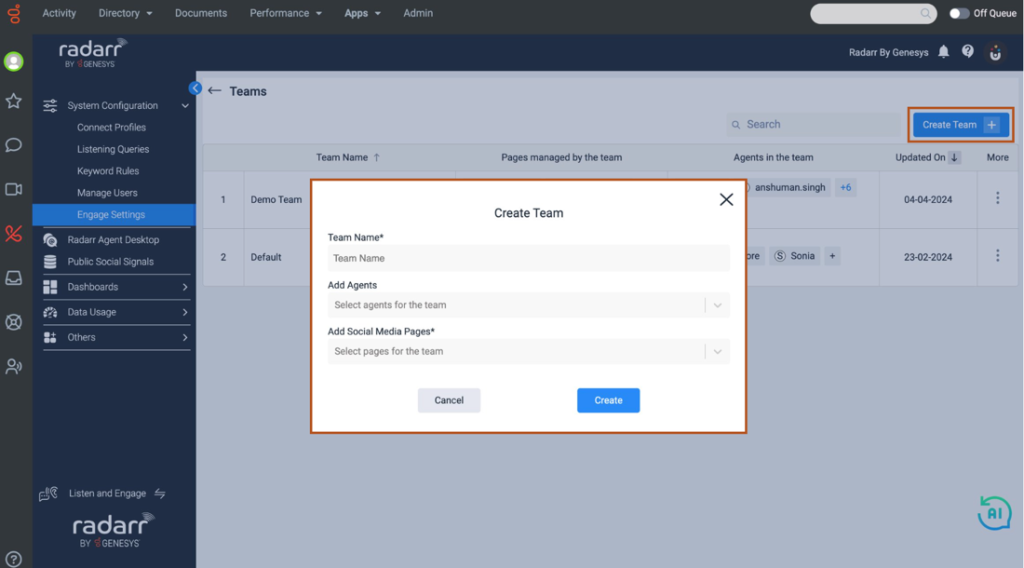
Teams can be created from the Engage settings. Teams can be given permission to view tickets from relevant social media pages and accounts. Please note that only four users can be created per account for the Radarr by Genesys Appfoundry trial. For paid subscriptions, please refer to the SKUs purchased by your company.
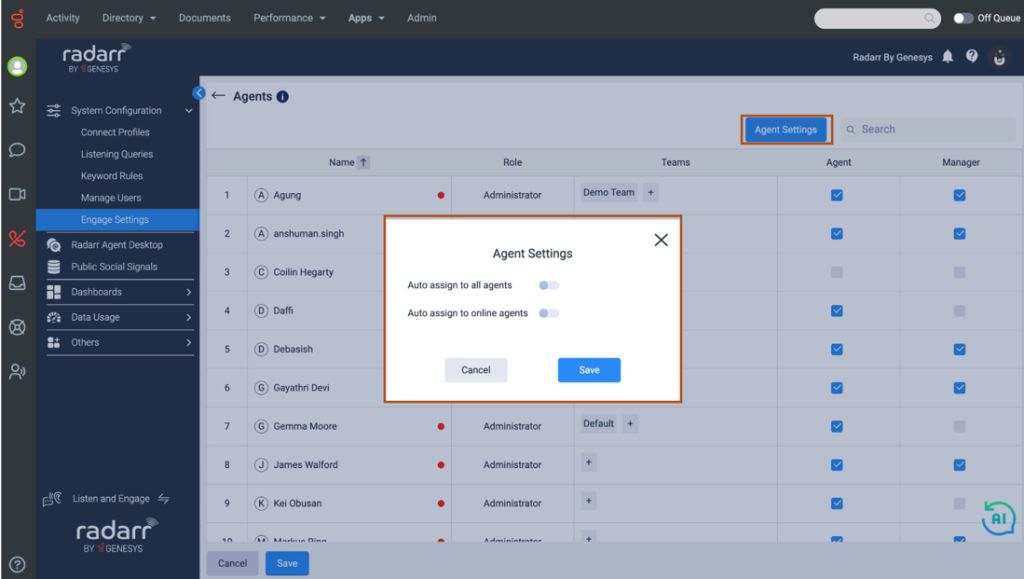
You can allow change agent permission under the agent settings.
We are now set, tickets will now start following into the system, you can manually assign tickets to agents or toggle the auto assign button under the agent settings
Language configuration is applicable only for customers who have configured Radarr by Genesys with Salesforce
You can now set your automation rules and workflow configurations under -> Workflow section
Tags allow you to segregate your tickets for further analysis or bulk actioning.
Business Hours can be created to set your expectations with your audience and keep them informed on your operating hours. You can also set away massages to be sent during your offline hours.

Canned Responses can be added to increase agent efficiency.
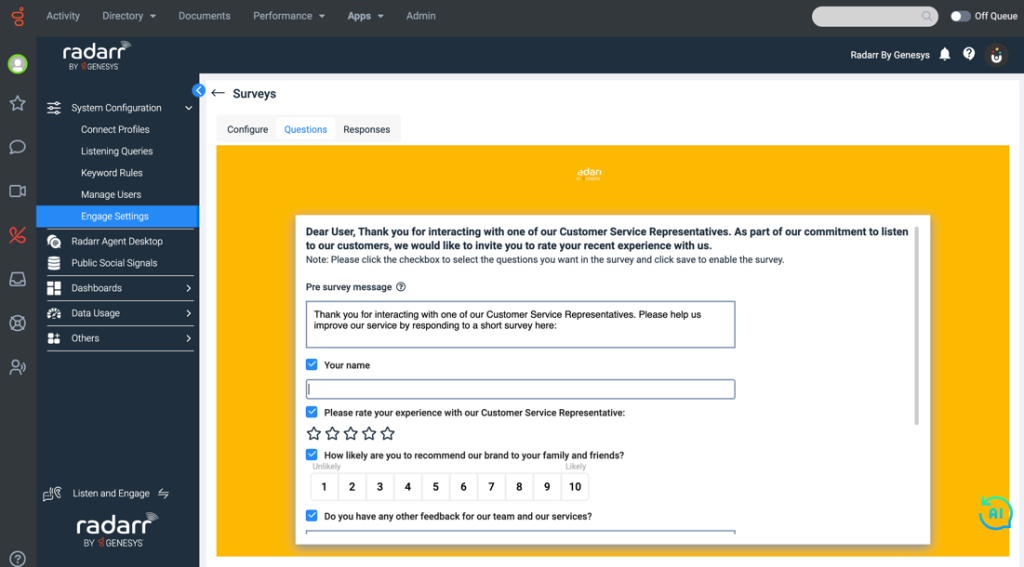
You can customize your CSAT survey’s that can be sent out after the tickets are closed to understand customer satisfaction levels
Automation Engine
Automation Engine allows you to automate manual tasks and optimize your team’s efficiency. You can create workflows by setting a condition followed by an action.
For example, you would like to automatically reply to Google Business and App Store reviews.
Create a new automation, name the workflow, and set a condition by clicking on the “+” icon now set the condition as below:
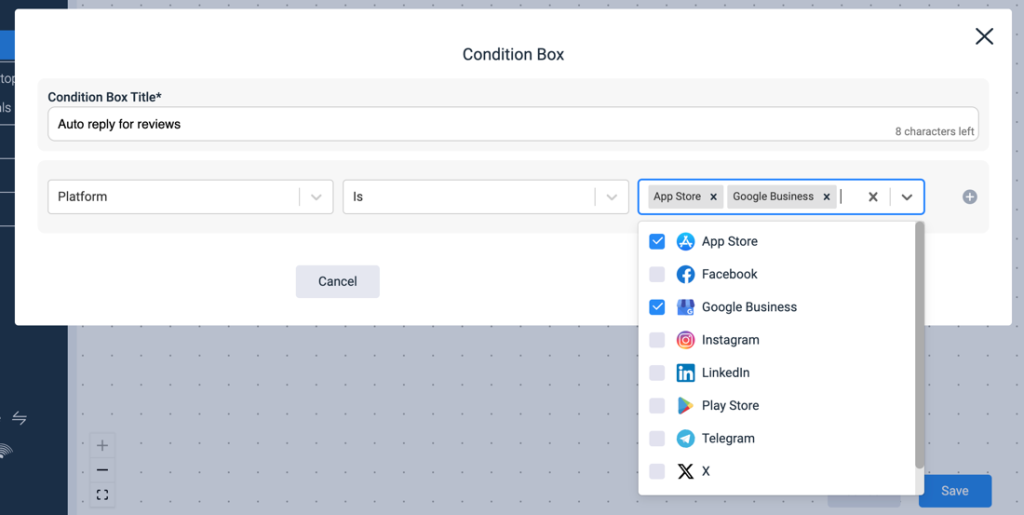
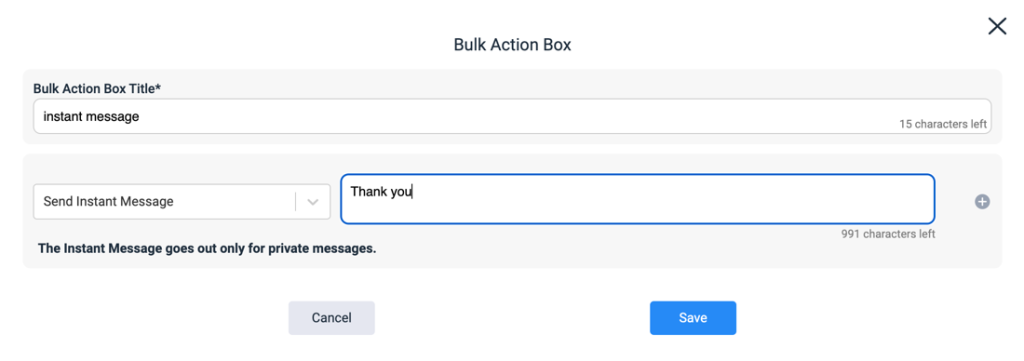
Hit save and select a condition if the above criteria is met:
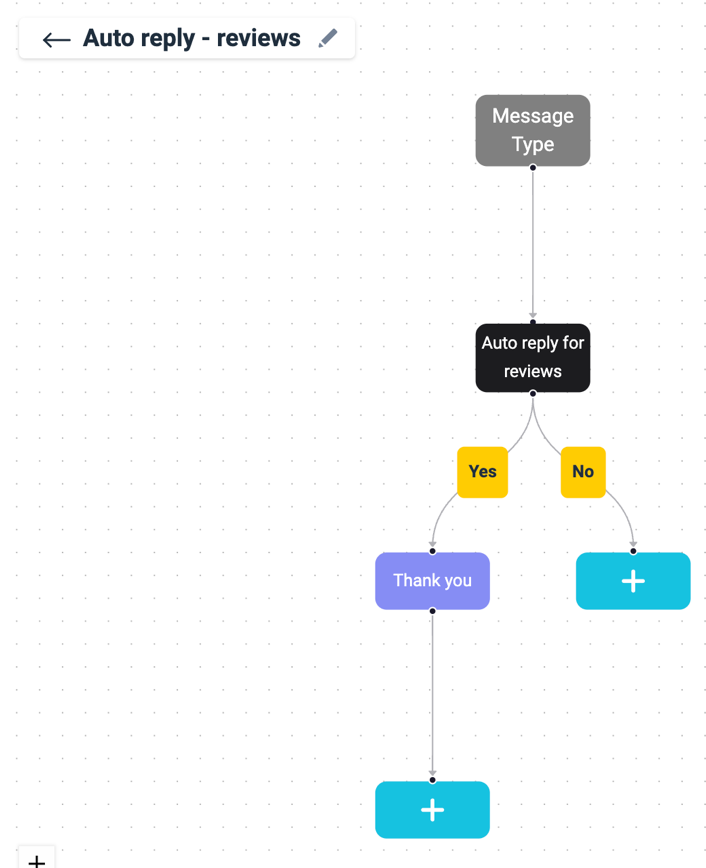
Your workflow would look like this:
Part 2: Agents Desktop
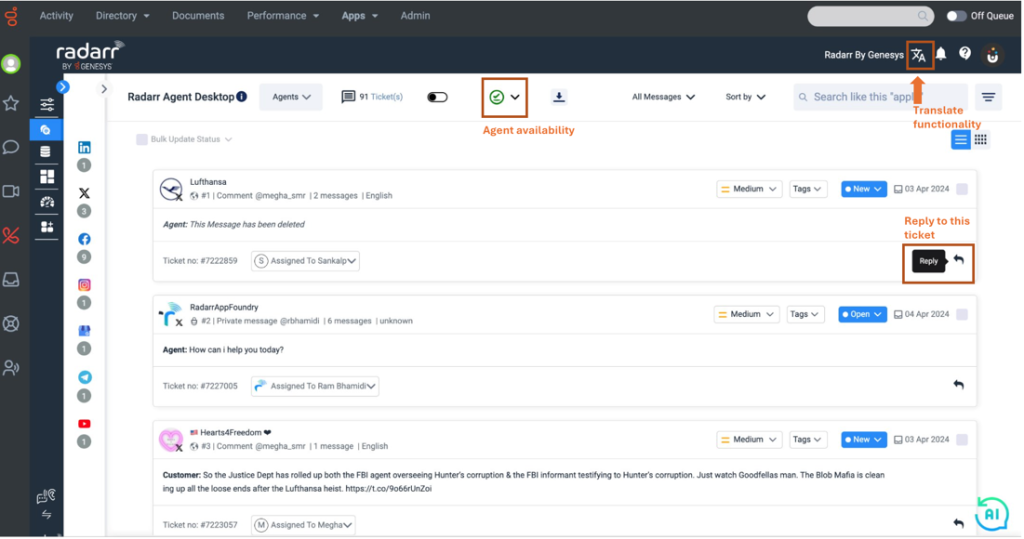
Once the configurations are finalized, your agents will be assigned tickets based on their permissions to view various social media pages. Agents can sort tickets based on the Ticket created date or Ticket update date.
Agents can hit the “reply icon” to start responding to tickets
SLA will be calculated based on the Business hours set under configuration.
Other available functionalities:
Active status – Agents can turn off their availability during breaks.
Translate – Agents can also translate the text into English or any other language.
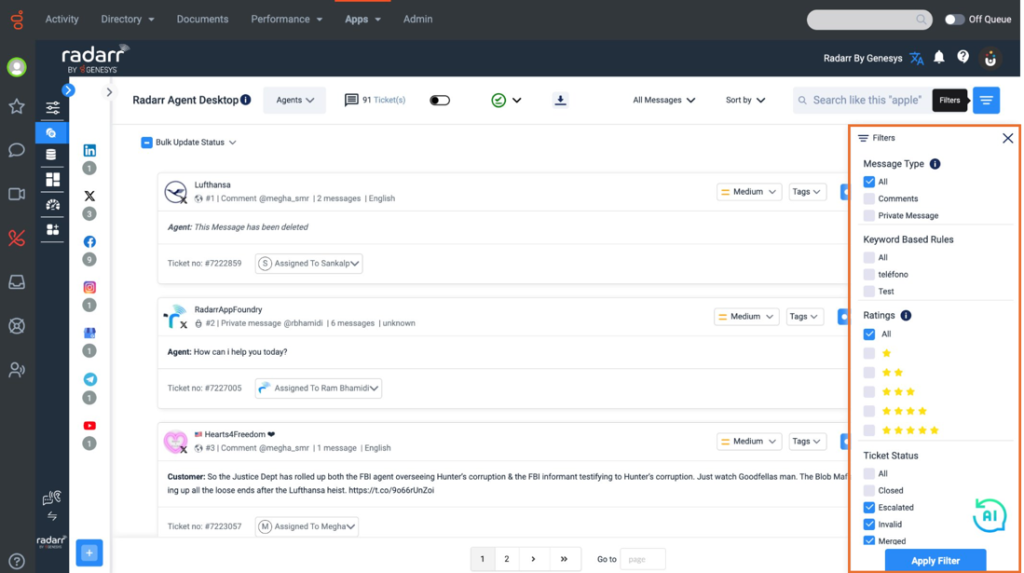
Ticket filters – Tickets can be filtered based on the message type, keywords, ratings, Ticket status, Ticket tags, Ticket priority, Ticket updating duration, Sentiments, Ticket creation duration, and Spam filters.
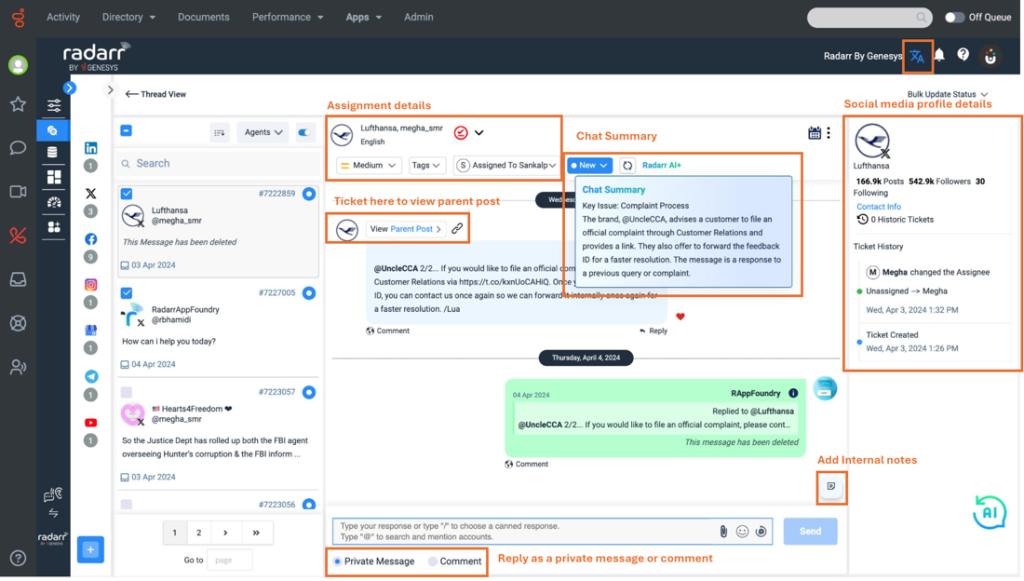
Features available on the Thread View
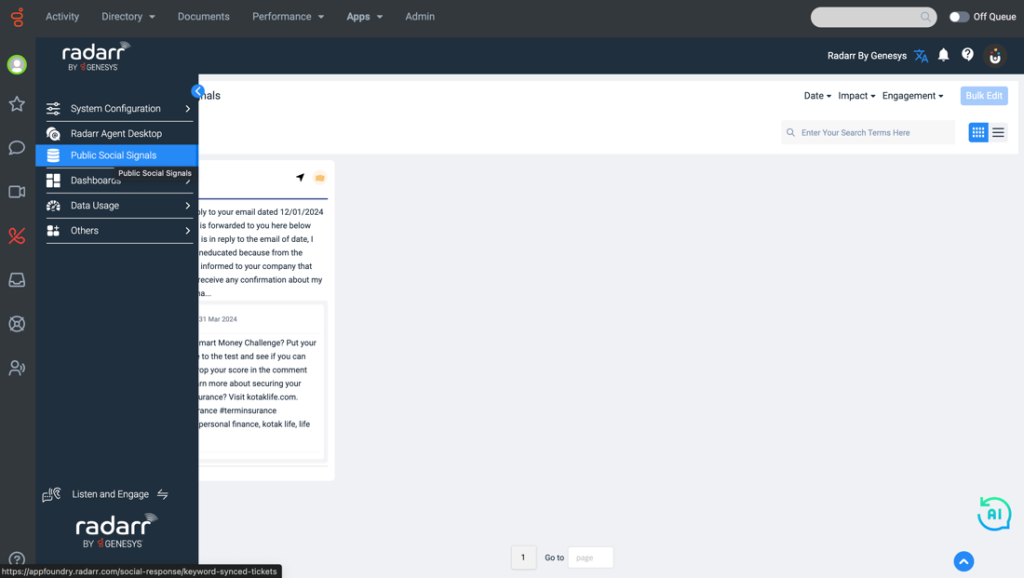
Posts/ comments fetched through keywords will be available under Public Social Signals.
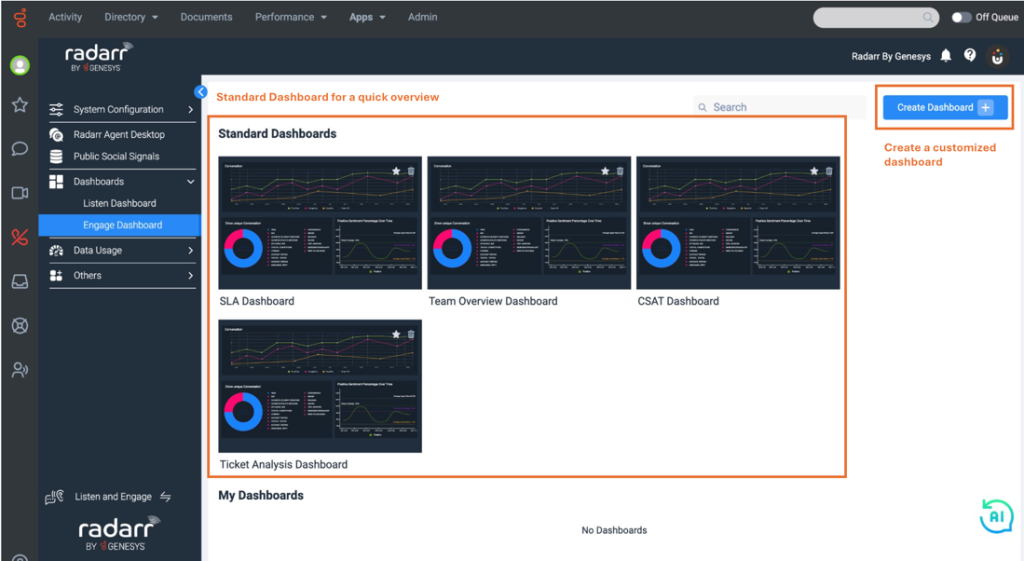
Dashboards -> Engage Dashboards
Allow admins and managers to analyse social media engagement, SLA’s, CSAT scores, agent and team performance, and much more.
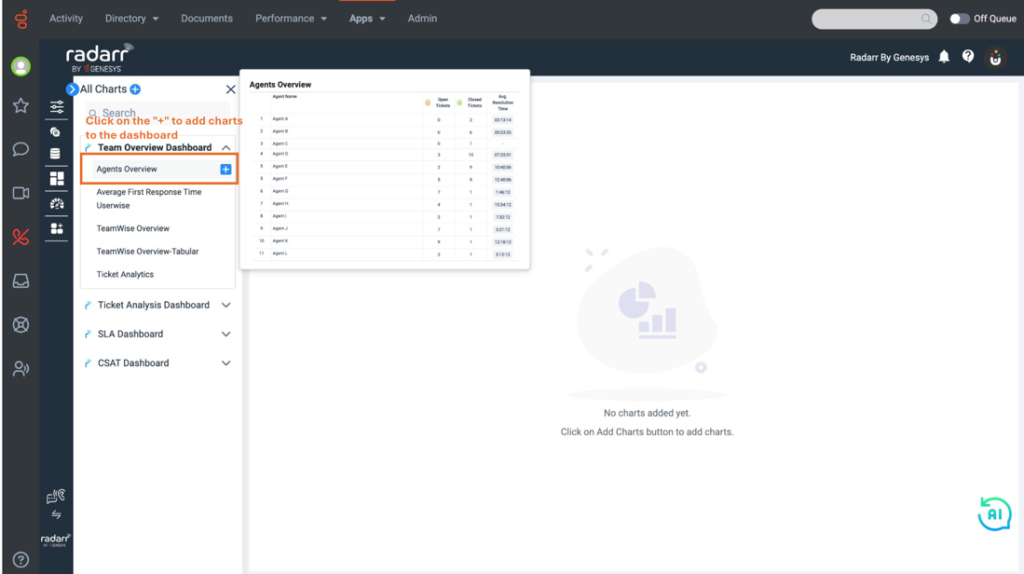
Simply navigate to standard dashboards to get an overview. You can click on “Create Dashboard” to customize your dashboard as per your requirements.
For additional information about Radarr by Genesys features, you may access our 24/7 Support Hub, training materials, and FAQs through this link – Radarr by Genesys Help and Support – Radarr by Genesys Support and Knowledge Base. You may also send us an email at cssradarrsupport@genesys.com.