Automation Engine in Engage
The “Automation Engine” will allow the users to define the rules based on triggers and actions when the tickets are created. This visual flow chart-like interface manages and monitors the rules added effectively.
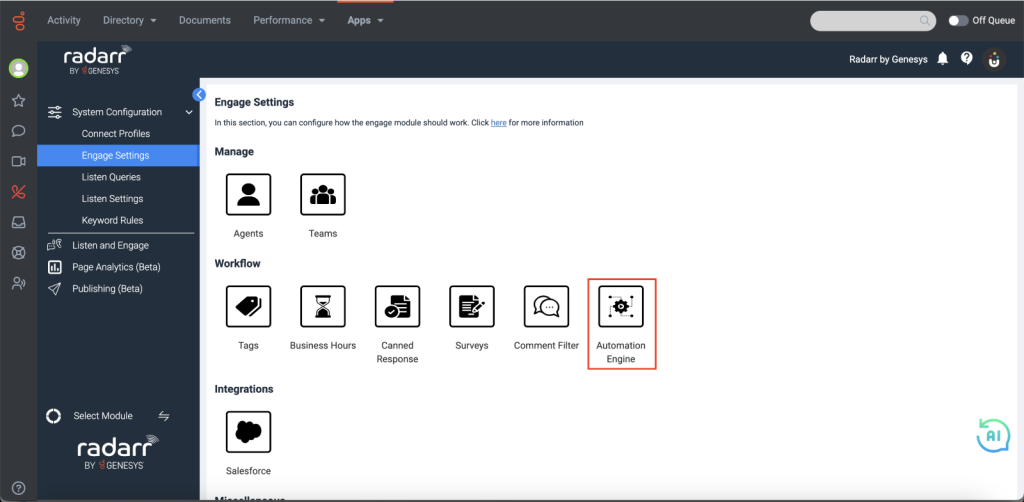
Navigate to the “Automation Engine” as shown in the image below,
System Configuration > Engage Settings > Automation Engine
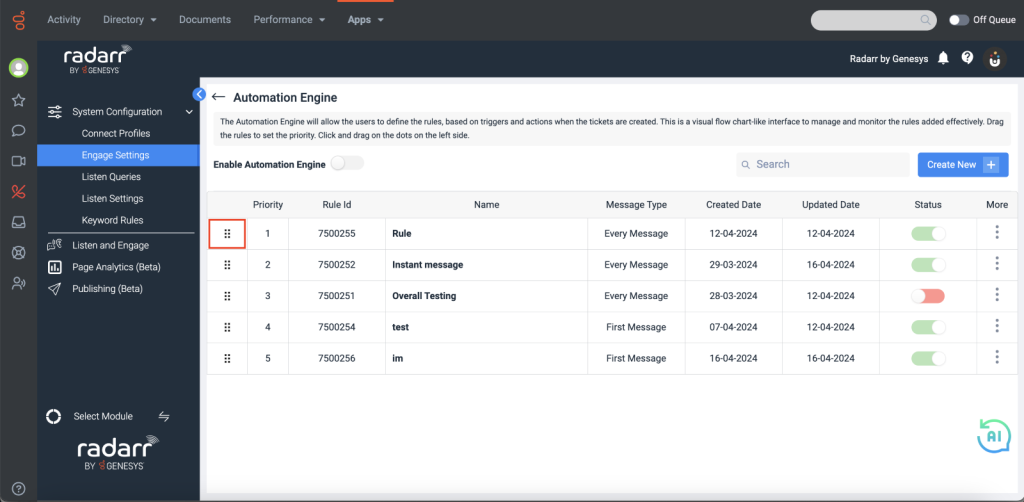
You can assign priority to each rule, by dragging them up/down
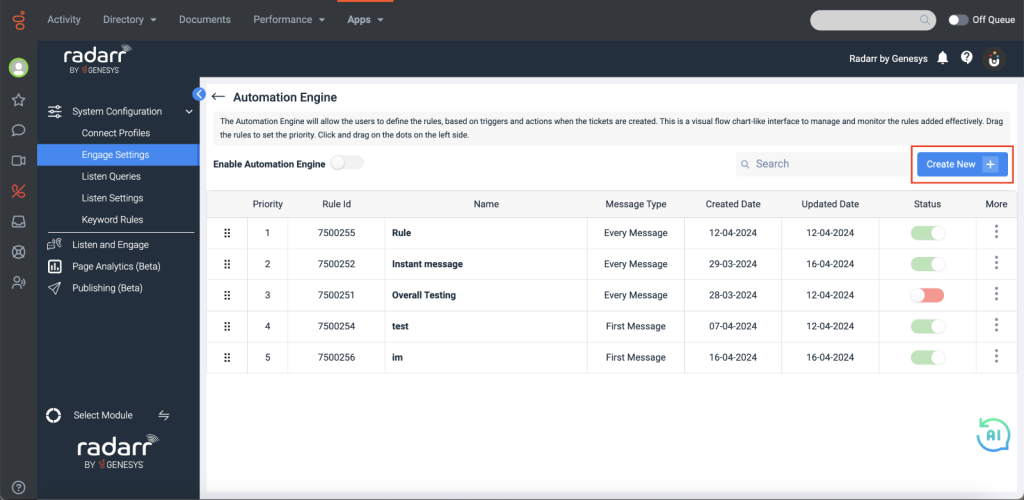
To create a new rule, click on the “Create New” button, and enter the name and description for the rule.
The automation interface appears as below. Click on the + icon to add the conditions
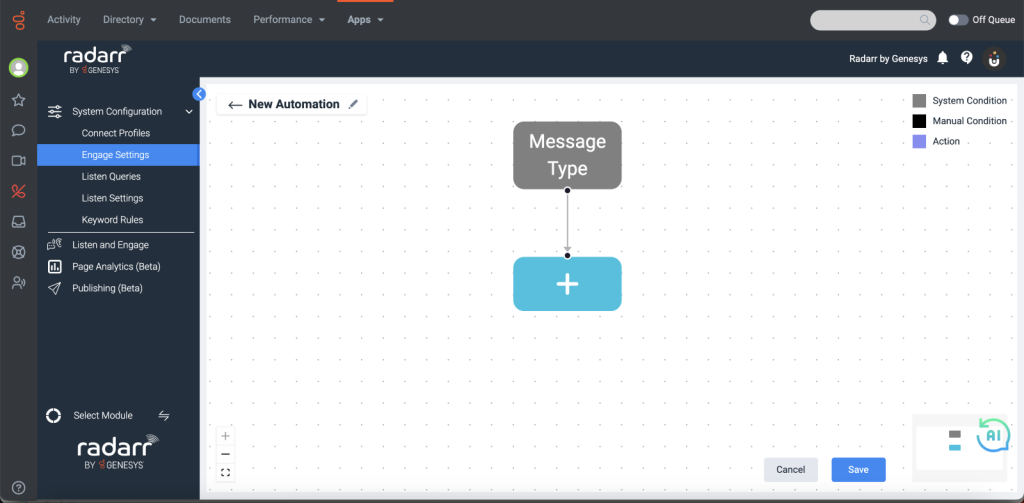
We have two types of conditions
- System Condition
- Manual Condition
- System Condition – This helps user to define whether they would like to execute the whole automation rule for only
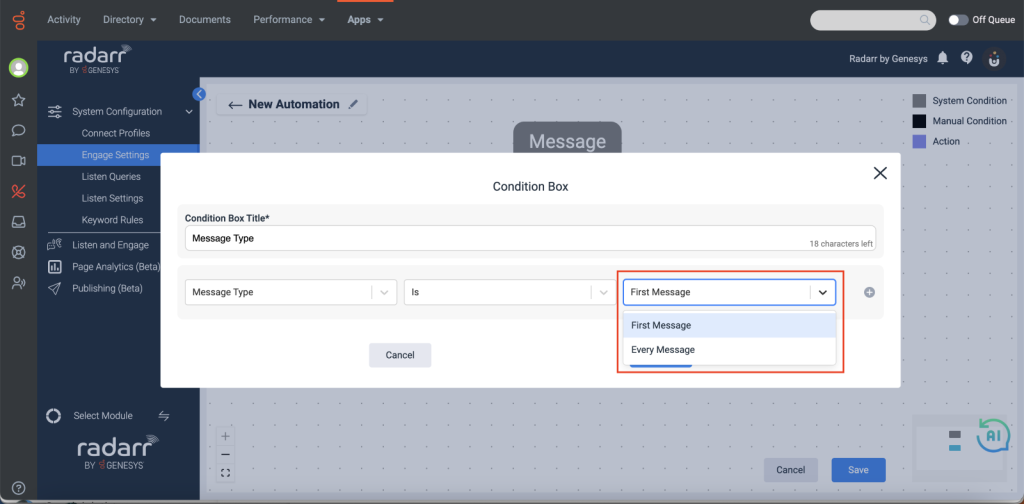
- First Message – If we select the “First Message” the automation rules set up will execute the rule only if the First message satisfies the conditions
- Every Message – If “Every Message” is selected the automation rule will execute for all the messages wherever the condition is satisfied
- Manual Condition – The condition box appears as shown below. You can add the title and select the field type, operator, and value to set the condition as per requirement.
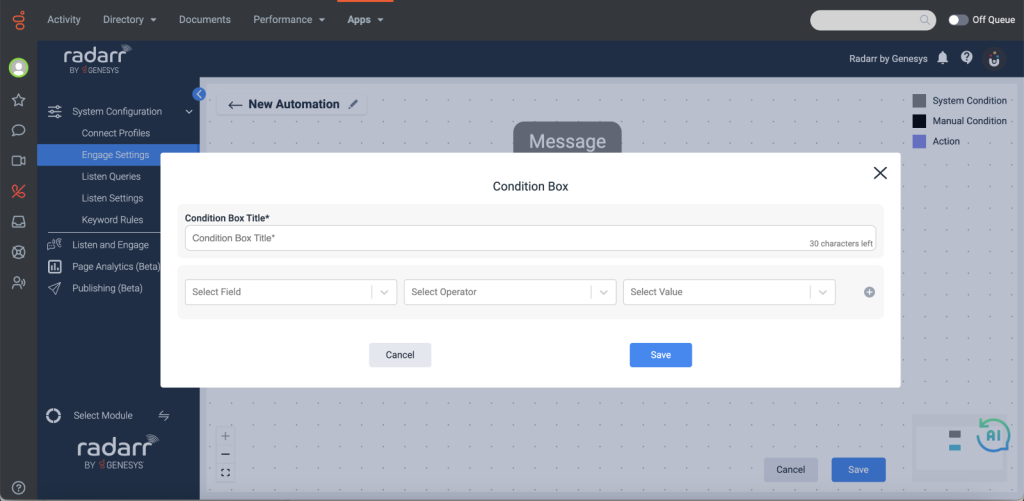
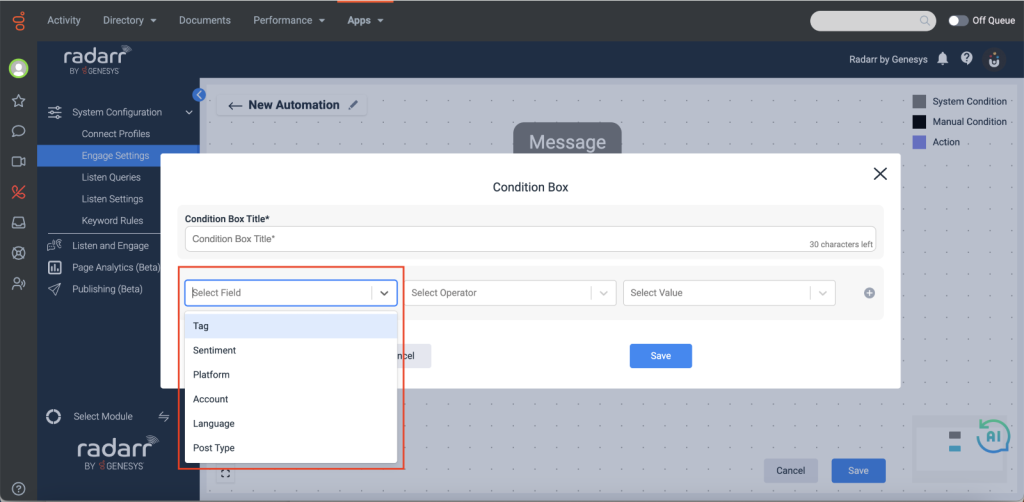
Elements of condition box
Title: Enter the desired title name
Field: The following field types are available
- Tag: Select the tags from the list of tags
- Sentiment: Positive, Negative, Neutral
- Platform: App Store, Facebook, Google Business, Instagram, LinkedIn, Play Store, Telegram, X, YouTube
- Account: Configured accounts will be listed
- Language: Select the required language(s)
- Post Type: Public Comment, Private Message
When Public Comments is selected for Post Type, the action will trigger only for comments and not for private messages.
When a Private Message is selected for post type, the action will trigger only for private messages and not comments.
Operator: The following operators are available
- Is
- Is not
Value: Values respective to the selected field will be listed
Bulk Action Box
Once you are done adding the conditions, you can select the bulk action and add the actions that is expected to take place.
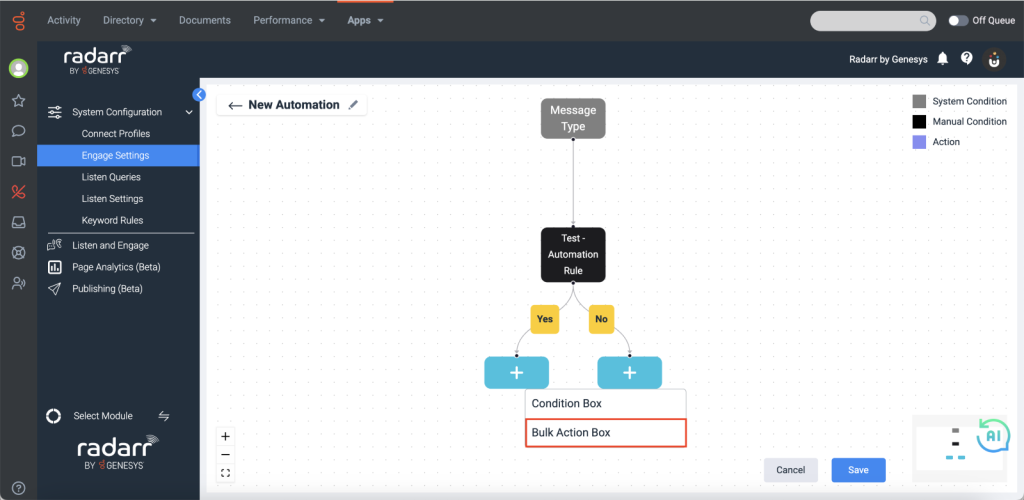
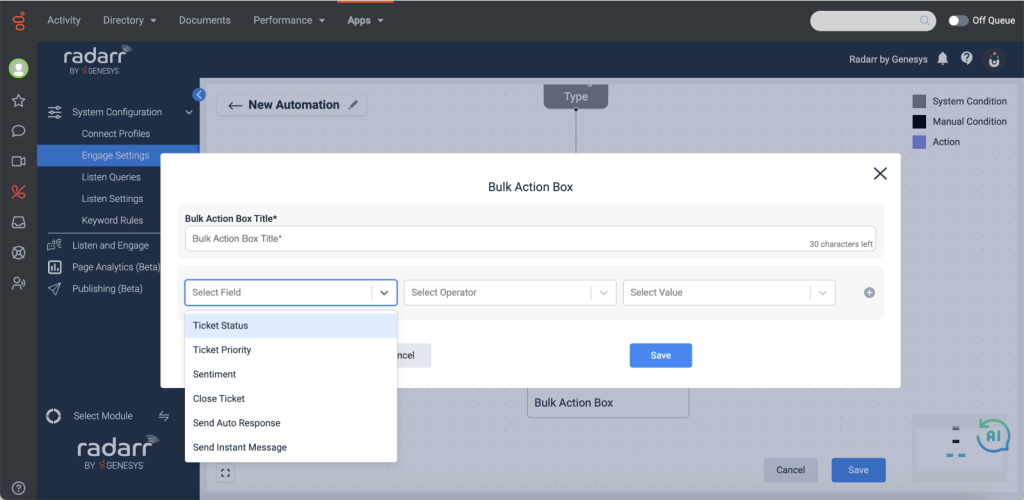
The following options are available for bulk action:
Fields:
1. Ticket Status: Closed, Escalated, Invalid, Merged, New, Open, Progress
2. Ticket Priority
2. Sentiment: Positive, Negative, Neutral
3. Close Ticket
4. Send Auto Response: Set the auto-response as required.
6. Send Instant Message
Once, done click on Save and the automation rule will be saved.
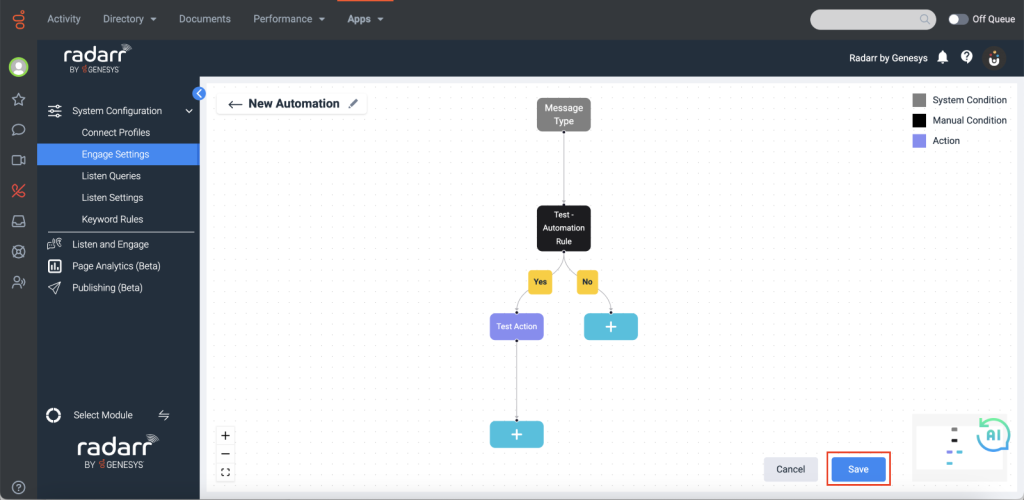
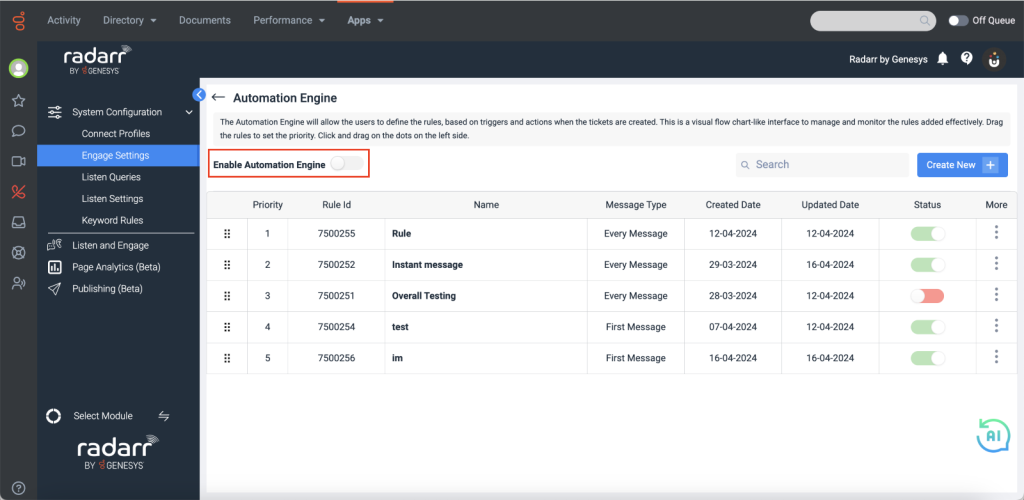
Created rules will not work unless we enable automation rules. We can enable the toggle button shown in the picture below to allow the automation rules.
