Setting Tags in Radarr Agent Desktop
Tags are a powerful tool in Radarr Agent Desktop that helps you automatically categorize customer interactions. This can save you time, improve organization, and allow you to easily track specific types of inquiries. This guide will explain how to create tags and use them to categorize your customer messages.
Step 1: Open Engage Settings in Radarr by Genesys application from the left side panel. Once in the Engage Settings module, click on Tags.
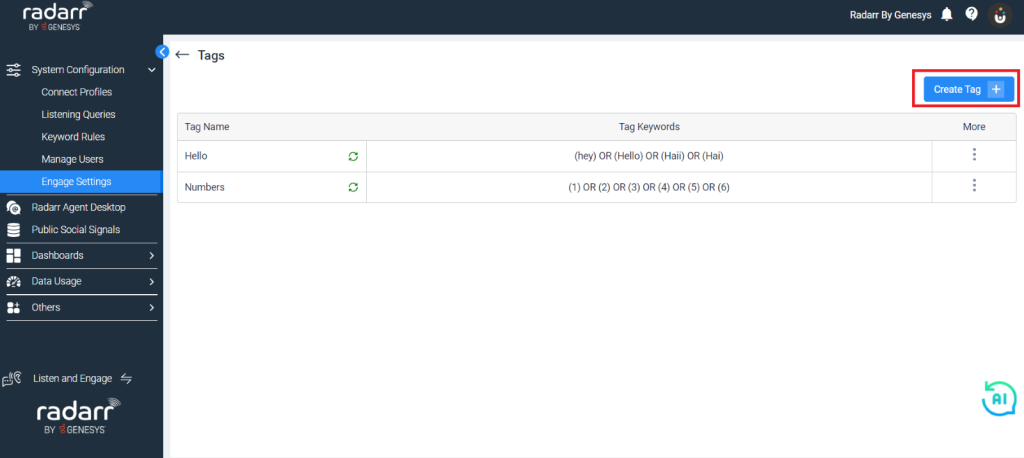
Step 2: To create a Tag, click the ‘Create Tags’ option in the top right corner of the page.
Once you click on ‘Create Tag’ the below window will appear.
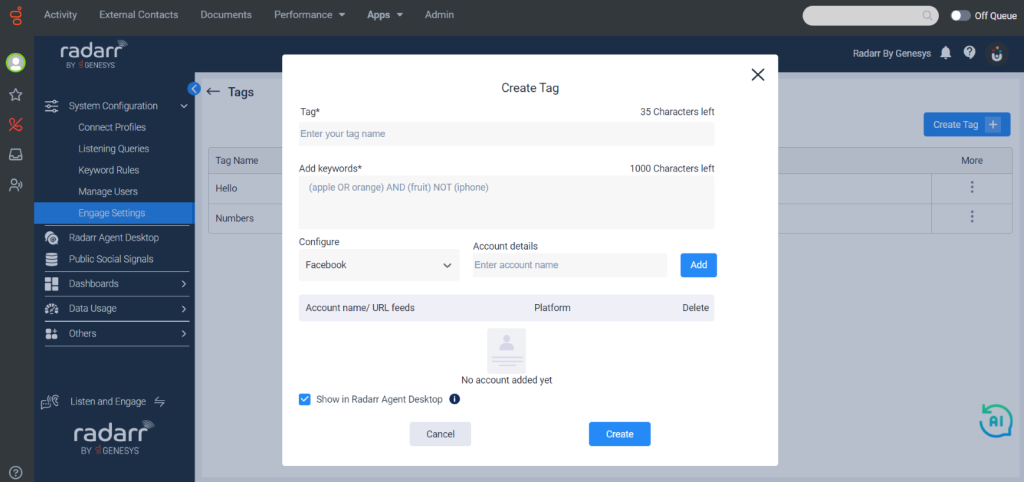
For example, here we will create a tag as ‘Complaint’ and put keywords as “complaint”, “not good”, “bad product” or “poor customer service”
So, any mention of these keywords from your customer will be classified as a ‘complaint’.
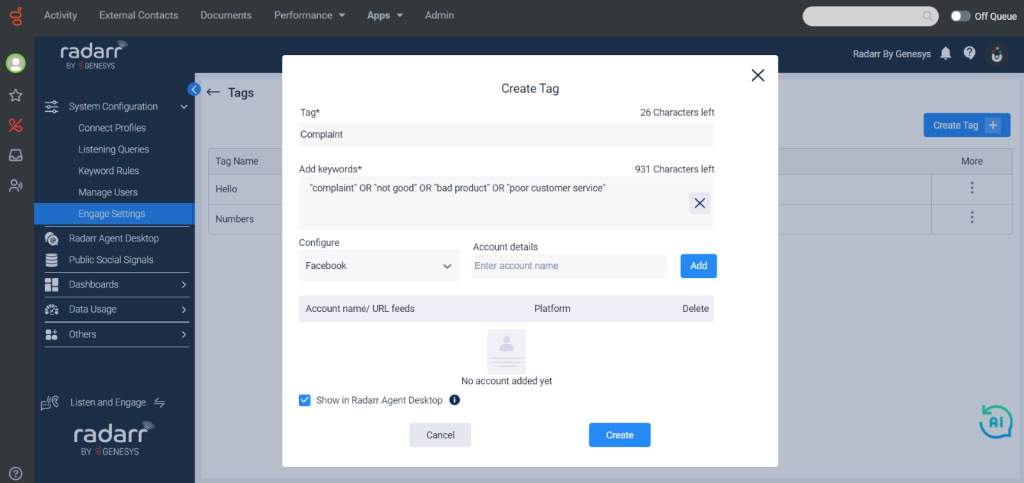
Please keep in mind that if you enable “Show in Radarr Agent Desktop”, the tickets associated with this tag will be visible to both the agent and the manager. Unchecking prevents tickets from being assigned to agents, and only managers will have access to them.
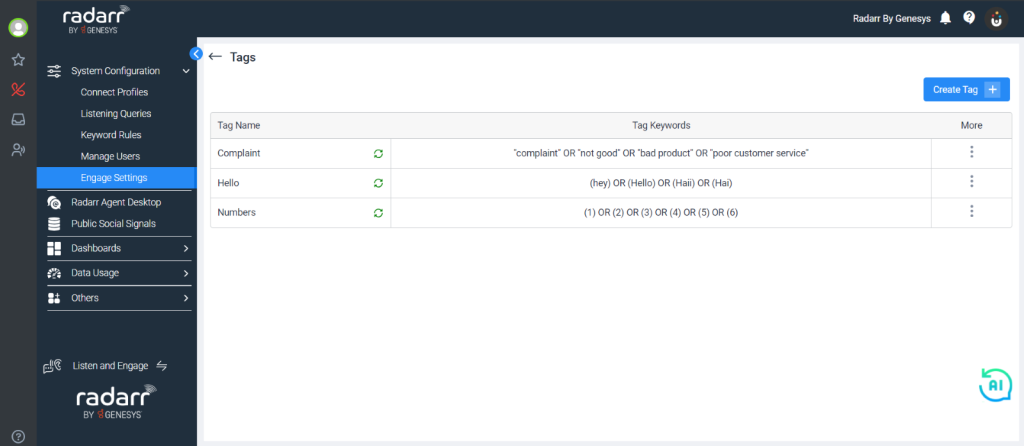
Once you click Create, your tag settings will appear as shown below.

Any messages from your customer that contain mentions of the keywords listed above will now be classified as Complaint or simply tagged with Complaint as a category.
NOTE: The tags will be attached to only the first message in a ticket thread and if the first message has the keyword match from the tag.
If a ticket has any tag attached, the tag will be highlighted in bold from the Tags dropdown.
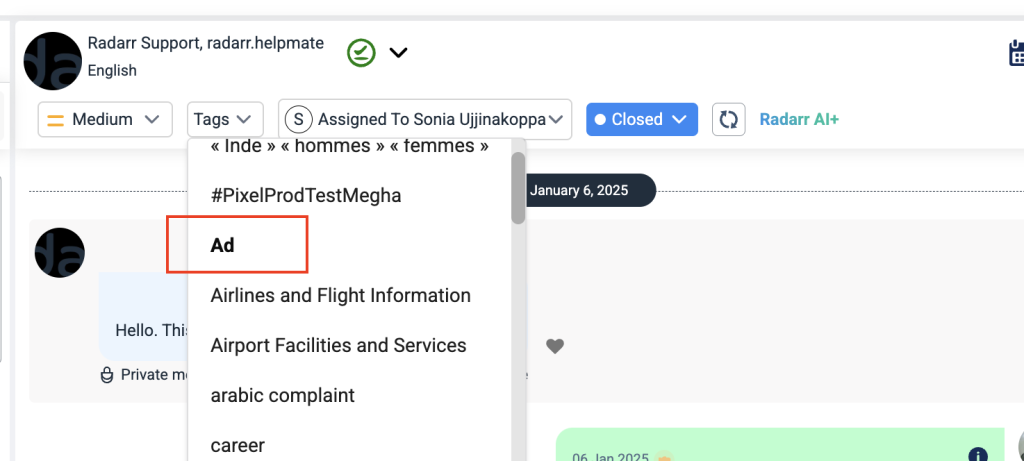
Fig: Ticket Tags Example
In addition, if you want to categorize your complaint based on specific platforms such as Facebook, Instagram, or Twitter, you can do so.
The following are the additional steps for configuring your social platforms in Radarr Agent Desktop tags.
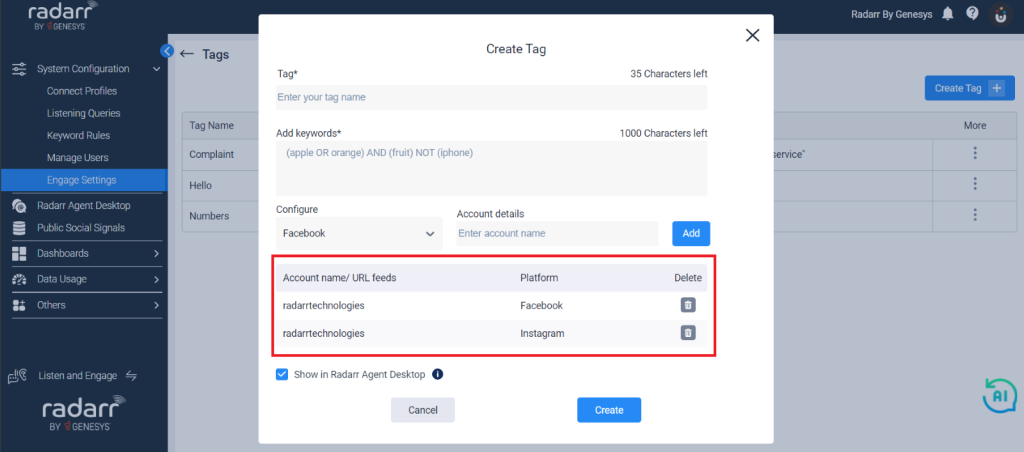
Step 1: Once you click on Create Tags and the Create Tag dialogue box appears, you will see a field to enter your platform information.
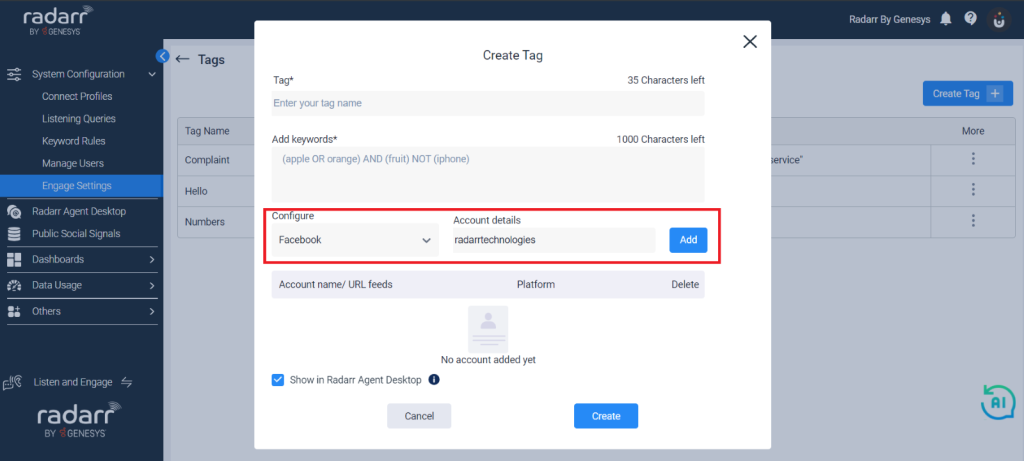
In the image below, we have included Radarr Technologies’ Facebook and Instagram platforms.
Any customer messages on Radarr’s Facebook or Instagram that include the complaint keywords will now be tagged with the Complaint category.
