How do I install Radarr by Genesys from Genesys AppFoundry?
A few things to ensure before installing Radarr by Genesys:
- An org/company needs to identify the user who will install the app because only one person per org can install it. This is important to avoid installation issues. Note that the user who will install the app will get admin privileges within the Radarr by Genesys app.
- The person installing Radarr by Genesys on Genesys Cloud becomes the ‘Radarr by Genesys owner’. There is only one owner for the app. The owner will have admin access and can add Radarr by Genesys admin users. Radarr by Genesys admin users share the same permission as the owner.
- The user who will install also needs to check and enable the following permissions on Genesys Cloud:
- General > Group Administration
- Integration > radarrSocialListening > All Permissions
- Integrations > Integration > All Permissions
- OAuth > All Permissions
- Authorization > Grant > All Permissions
- Directory > Group > All Permissions
- Authorization > Role > All Permissions
After ensuring the above criteria, follow the steps below to install the app:
I. Initial Steps for Trial Customers
1. Login to Genesys Cloud as usual by visiting the Genesys Cloud Login page. Go to https://appfoundry.genesys.com then search for “Radarr”
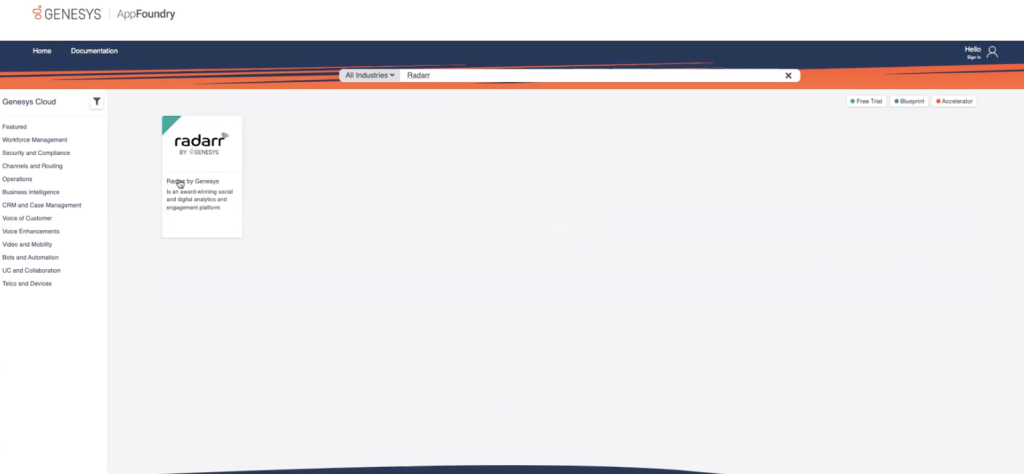
2. Once you’re on the Radarr by Genesys product page, make sure that you’re logged in to Genesys Cloud, then click the “Free Trial” button. If you see “Configure” button instead of “Free Trial”, it means that another user in your org has already purchased the app and may have also installed it. Please reach out to them to ensure the installation and configuration process works for you.
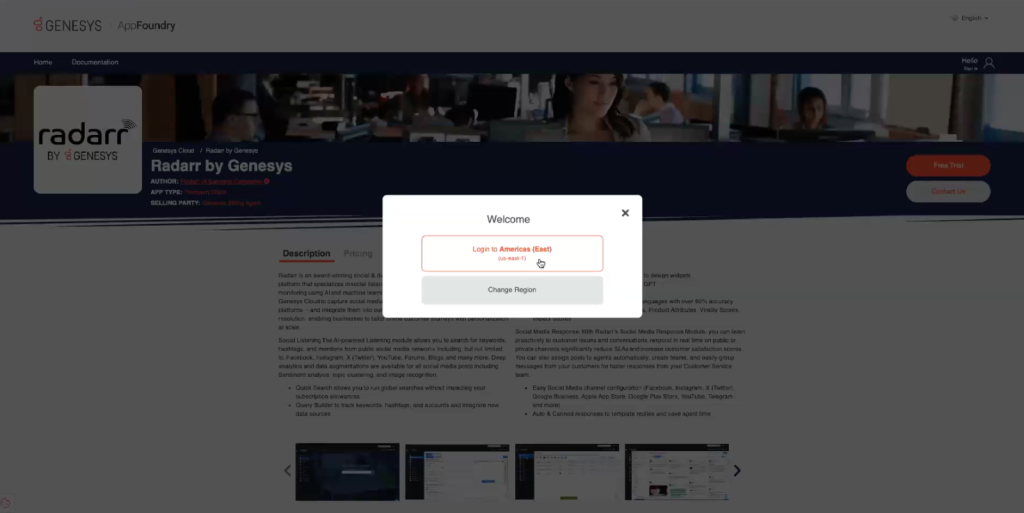
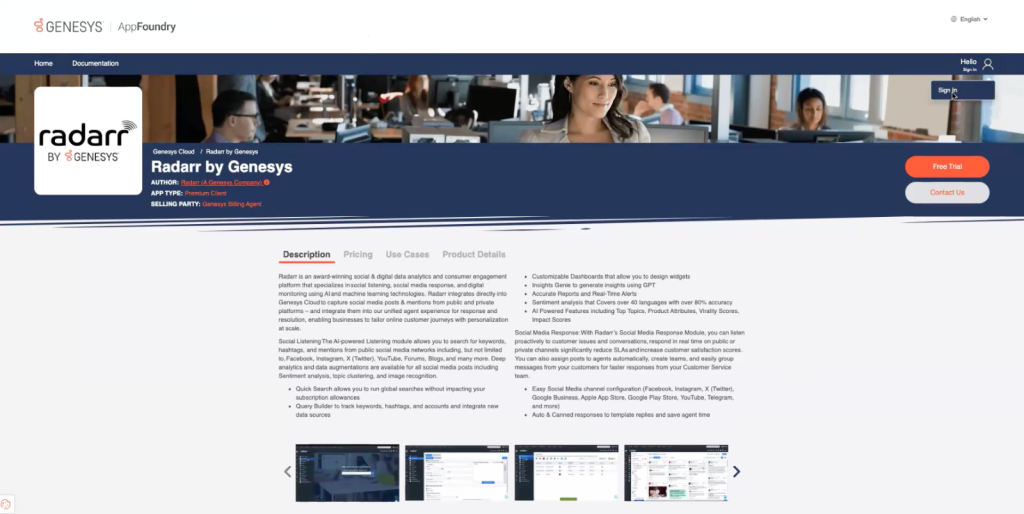
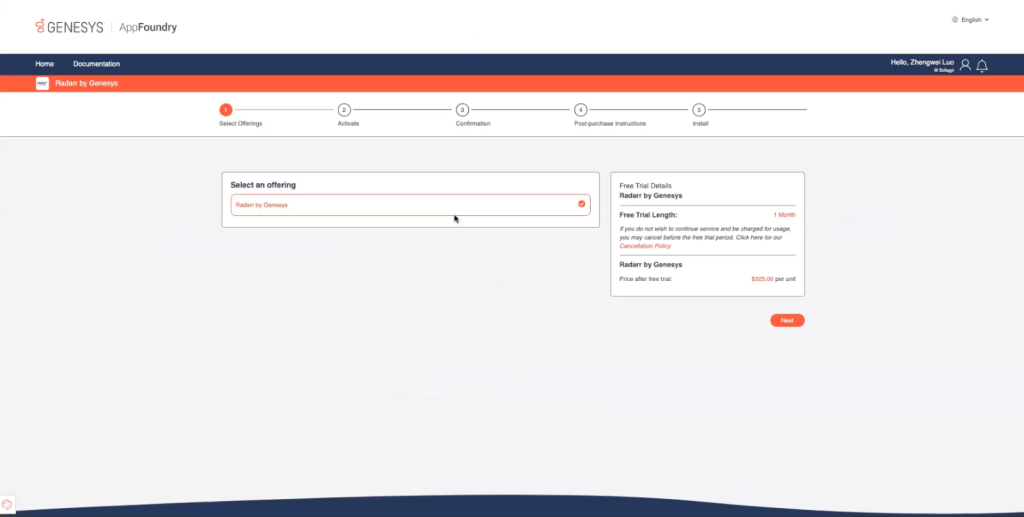
3. After clicking “Free Trial”, you’ll be directed to the step-by-step installation process.
- Select Offerings – This shows that you’ll sign up for a one-month free trial, which will be charged $325.00 after the first month. Click “Next”.
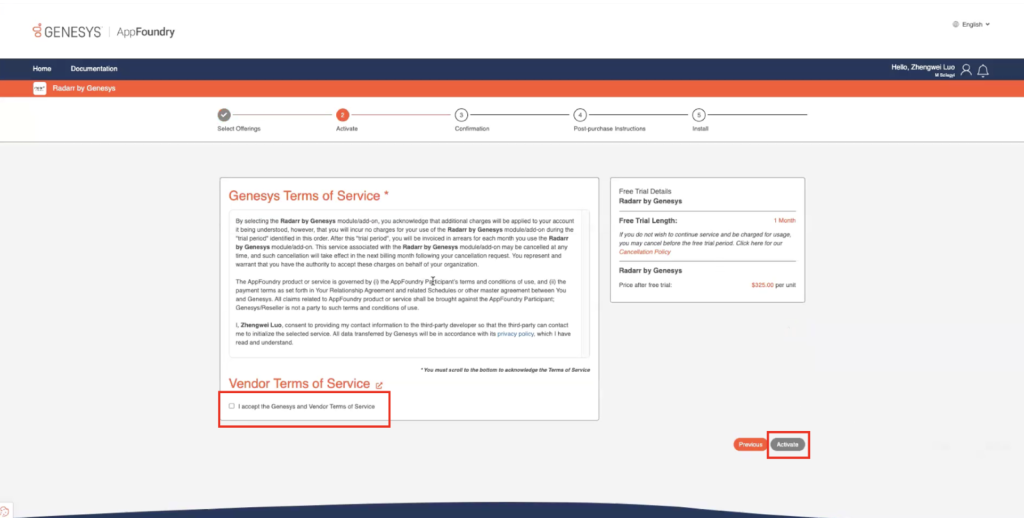
- Activate – Please review the Genesys Terms of Service on the page and click on “Vendor Terms of Service” to review the document that will open in a new tab. After reviewing the documents, go back to the installation tab and tick the checkbox to accept the terms of service then click the “Activate” button on the bottom right corner of the screen.
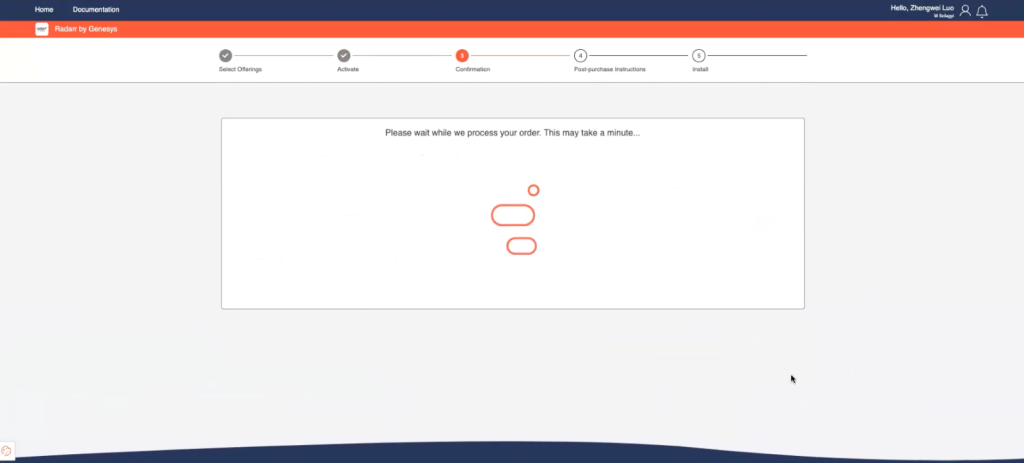
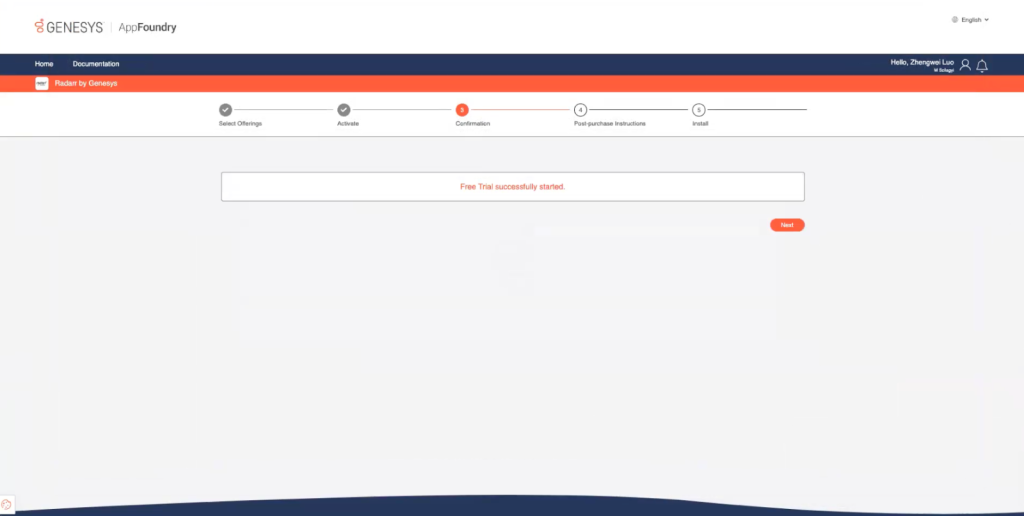
4. You’ll then wait for a few seconds so that your order can be processed. Once the screen says “Free Trial successfully started”, click “Next”.
5. You will see the “Post-Purchase Instructions”.

6. After which, you’ll see a link with the Radarr by Genesys installer.

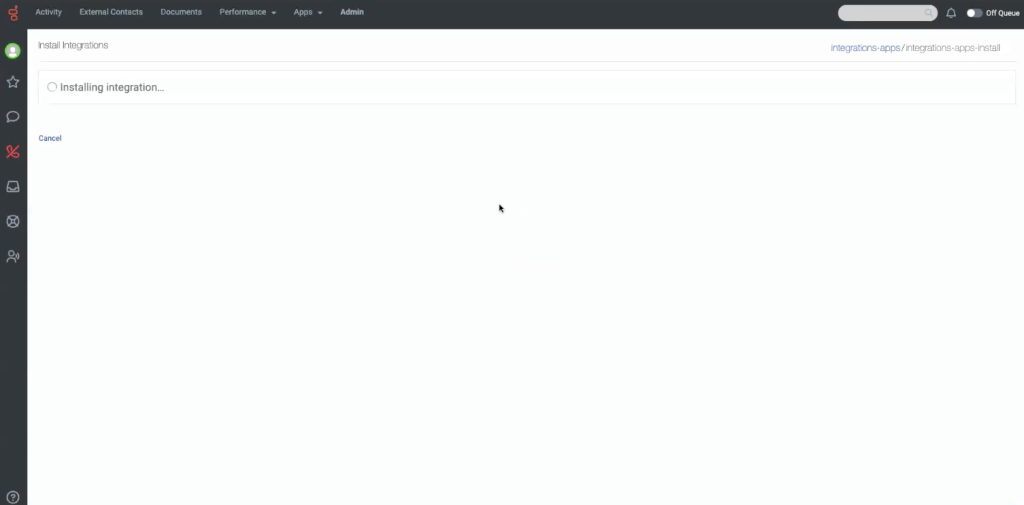
7. After which, you will be taken to the installation wizard. Please proceed to Part III of the guide to follow the next steps.
II. Initial Steps for Paid Subscriptions
- After the Account Executive submits the Radarr by Genesys order, they will notify you that the order has been processed. After which, any Genesys Cloud user in your org with the following permissions can log-in to Genesys Cloud then go to “Admin” > “Integrations” > click “+Integrations” on the upper right corner of the page > search for “Radarr” on the search bar > then click “Install” on the lower left corner of the “Radarr by Genesys” tile:
- General > Group Administration
- Integration > radarrSocialListening > All Permissions
- Integrations > Integration > All Permissions
- OAuth > All Permissions
- Authorization > Grant > All Permissions
- Directory > Group > All Permissions
- Authorization > Role > All Permissions


2. A pop-up window will appear where you’ll need to agree to the Terms of Service, then click “Yes”. After which, you will be taken to the installation wizard. Please proceed to Part III of the guide to follow the next steps.

III. Main Installation Steps for Both Trial Customers and Paid Subscriptions
- Click “+Add Role”, type “admin” (all lowercase), then click on it when it appears on the drop-down menu. Click “Save”.


2. After saving the “admin” role, toggle the “Inactive” button to “Active”. Click “Yes” in the pop-up window, then click “Save” at the bottom of the page.


3. Once it says “Active”, you need to refresh your browser to fully activate the Radarr installer. After refreshing, the Radarr installer “Radarr for Genesys – Installation Wizard” will appear in the “Apps” drop-down menu.

4. You will be taken to the Radarr install wizard where you’ll click “Start” then “Install”. Please wait for a few seconds for the installer to run, then click “Go to Application”.
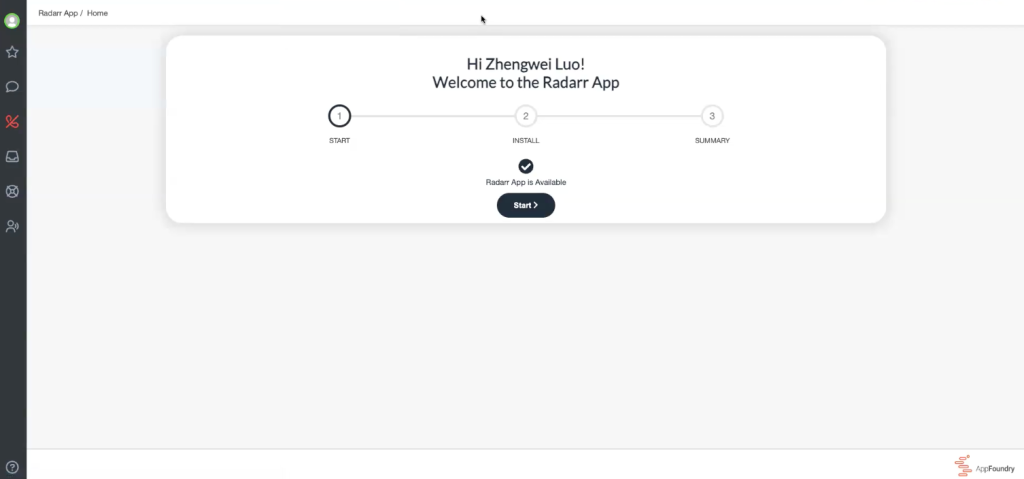
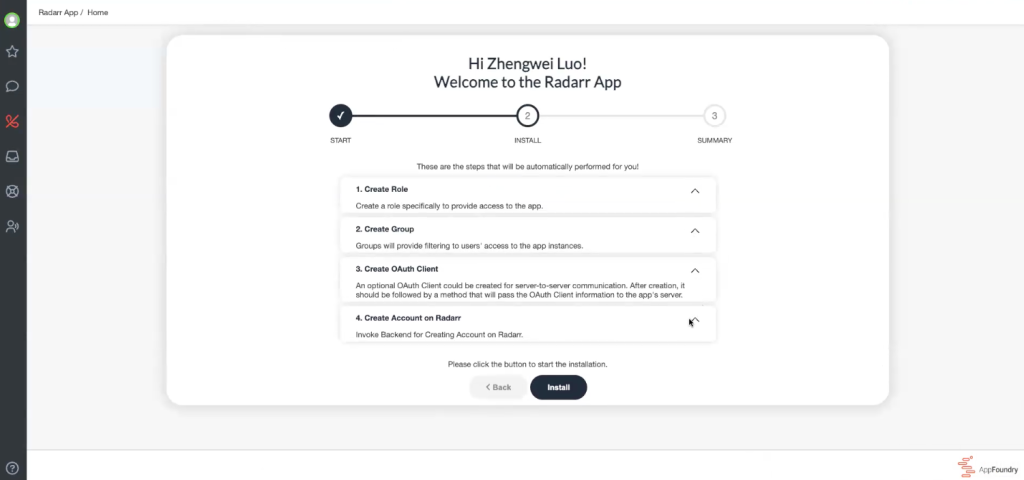

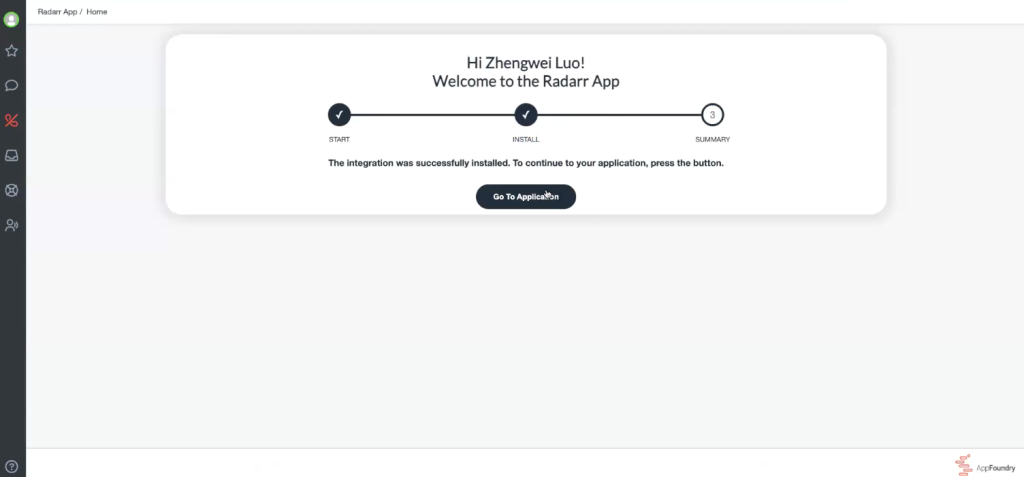
5. You will see the Radarr App welcome page where you will see a guide and an instructional video.

6. You will have to refresh your page so that you can find the app installed as “Radarr by Genesys App” under your “Apps” menu.

7. After the app is installed, go to the “Admin” tab > “Integrations” > look for “Radarr by Genesys App” > click on the app name > make sure that both “admin” and “Radarr_AppUsers” are under Permissions. If they are not, click “Add Role” then search for these roles. Click “Save” to apply changes.
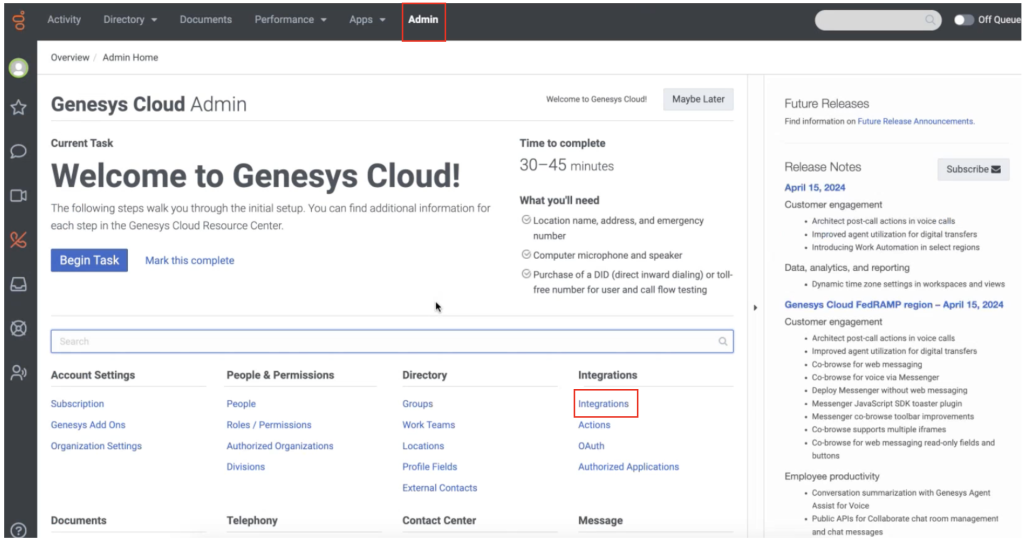
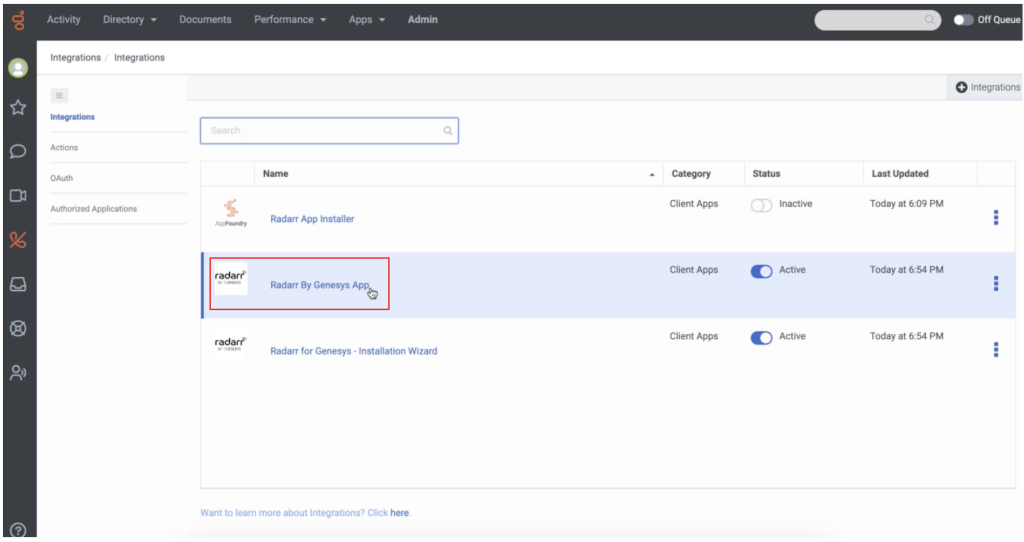
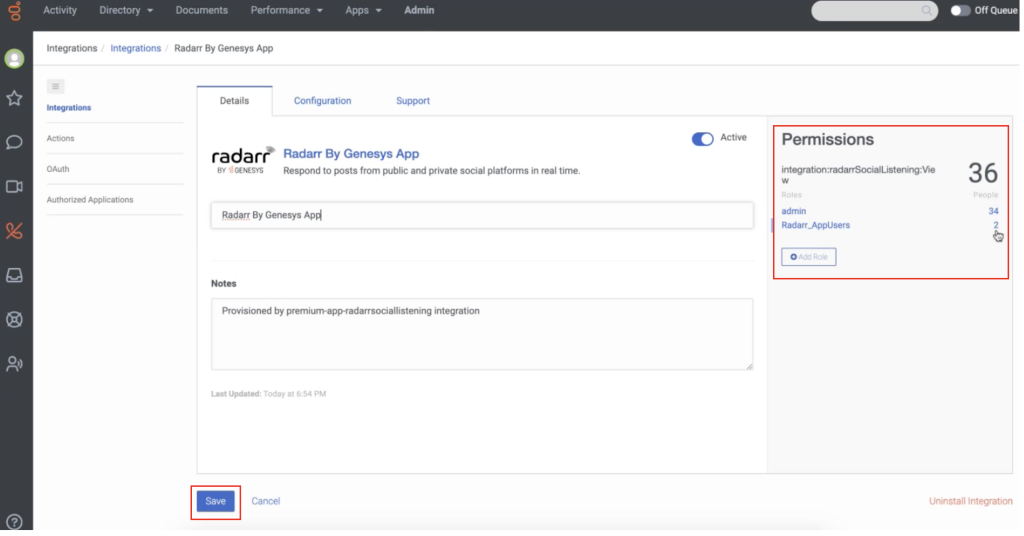
8. Go back to “Admin” > “People & Permissions” > click “Roles / Permissions”

9. Click “admin” under the “Role” column

10. Click “Permissions”, choose “All Permissions”, then type “radarr” on the search bar. Tick “integration > radarrSocialListening > view”. Click “Save”, then click “Yes” in the pop-up window that will appear.


11. Click on “Radarr by Genesys App” under the “Apps” tab, which will take you to the app itself, where you’ll click “Sign In with Genesys” to log in to the app.

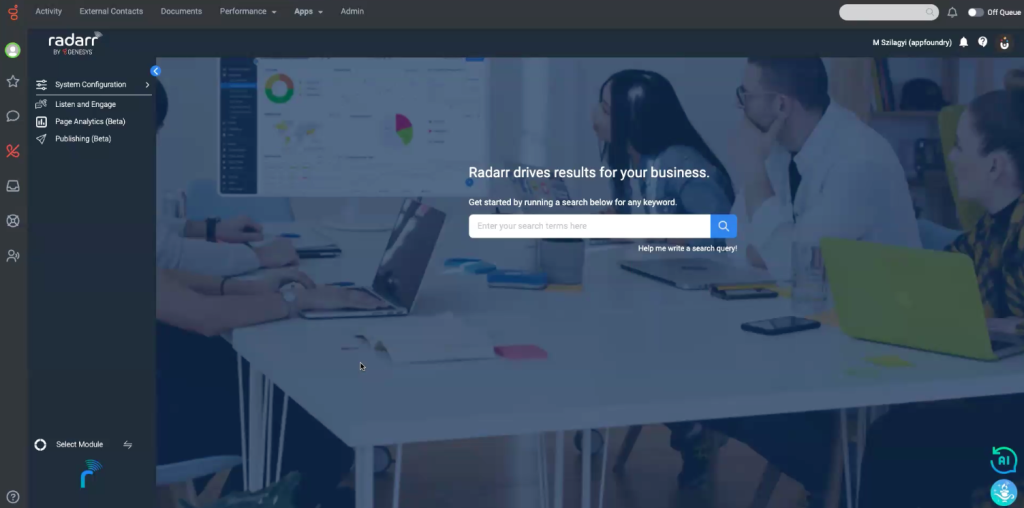
12. Once you have successfully installed the app, you should deactivate the Installation wizard to prevent other users from accidentally installing it again. To remove the “Radarr for Genesys – Installation Wizard” from your “Apps” menu, go to “Admin” then click “Integrations”. When you’re at the list of Integrations, type “Radarr for Genesys – Installation Wizard” on the search bar, then toggle the status from “Active” to “Inactive”. Click “Yes” to deactivate it. Ensure to refresh your page so that the installer will be gone from your “Apps” menu.
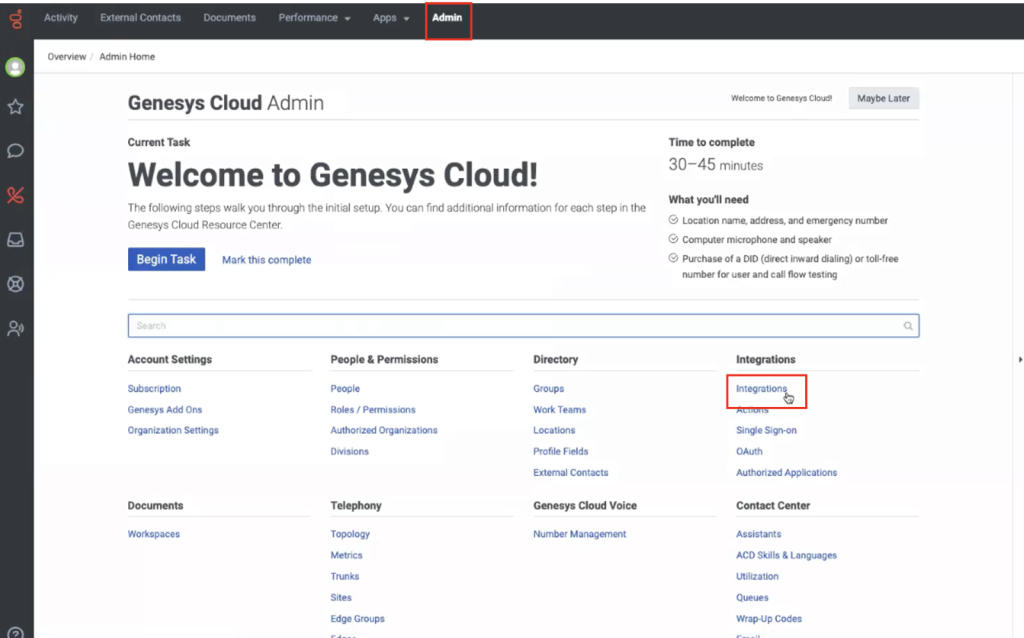


If you have reached here, Congratulations on the successful installation of the Radarr by Genesys App. Now, refer to this article to learn how to add new users that can access the app.
For additional information about Radarr by Genesys features, you may access our 24/7 Support Hub, training materials, and FAQs through this link – Radarr by Genesys Help and Support – Radarr by Genesys Support and Knowledge Base. You may also send us an email at cssradarrsupport@genesys.com.