How do I add new users to Radarr by Genesys?
NOTE: A Genesys Cloud user must have access to the “Admin” tab and must also be a Radarr Admin user to add subsequent users and change their user access type within Radarr. This article, which is also linked at the end of this article, shows the steps on how to do this.
The user needs to log in to Radarr by Genesys first before their access type can be changed. Their name won’t show up on the user list if they haven’t logged in yet. This article will guide them on what they need to do when their Radarr by Genesys user account is created. After any of the subsequent users have been made Radarr Admin, they can also change other users’ access type within Radarr.
Adding an existing Genesys Cloud user (does not have to be a GC admin):
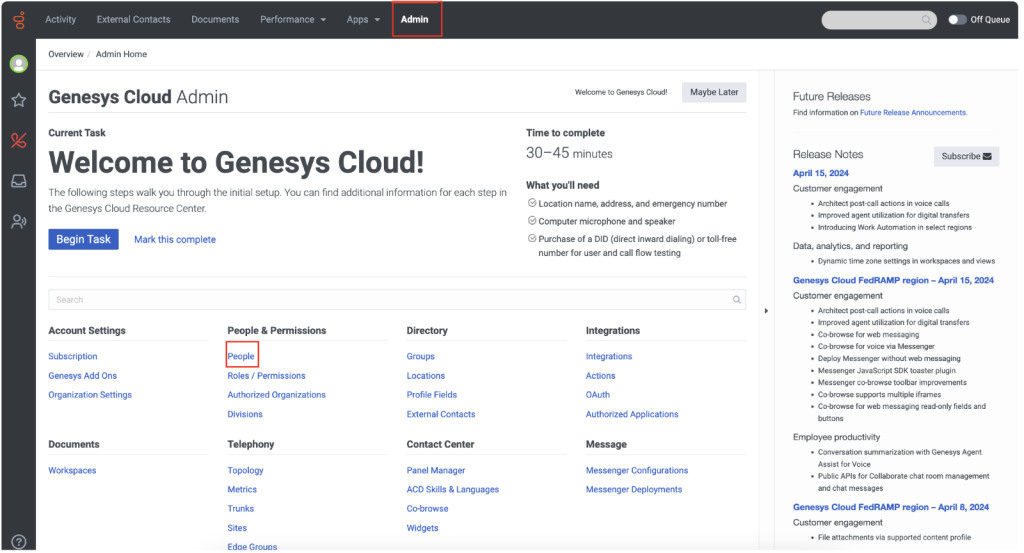
- Go to the “Admin” tab in Genesys Cloud > People & Permissions > People
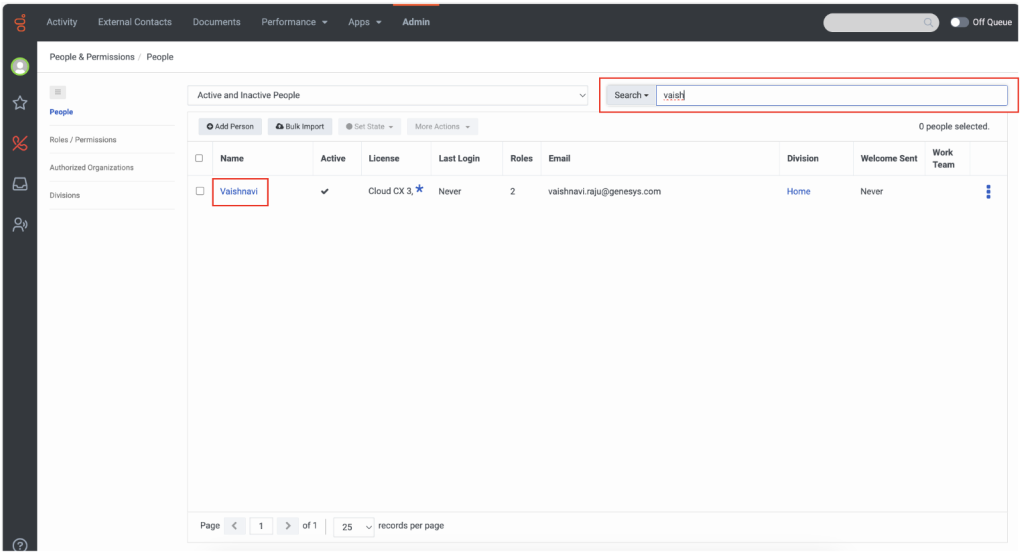
- Using the search bar, type the name of the person you would like to add as a Radarr by Genesys user, then click on their name in the “Name” column
- After clicking their name, ensure that “All” is selected beside “View”. Use the search bar to check that they have the following permissions:
- “employee” OR “User”
If they don’t have it, simply toggle the button under the “Assigned” column. Click “Save”.

4. Next, you need to add the user to the “Radarr_Users” group so that they will see the app in their Genesys Cloud account. To do this, go to “Admin” > “Directory” > “Groups”. Select “Radarr_Users”, then click “Edit”. Search for the name of the new user added, click it once it appears, then click “Save”.
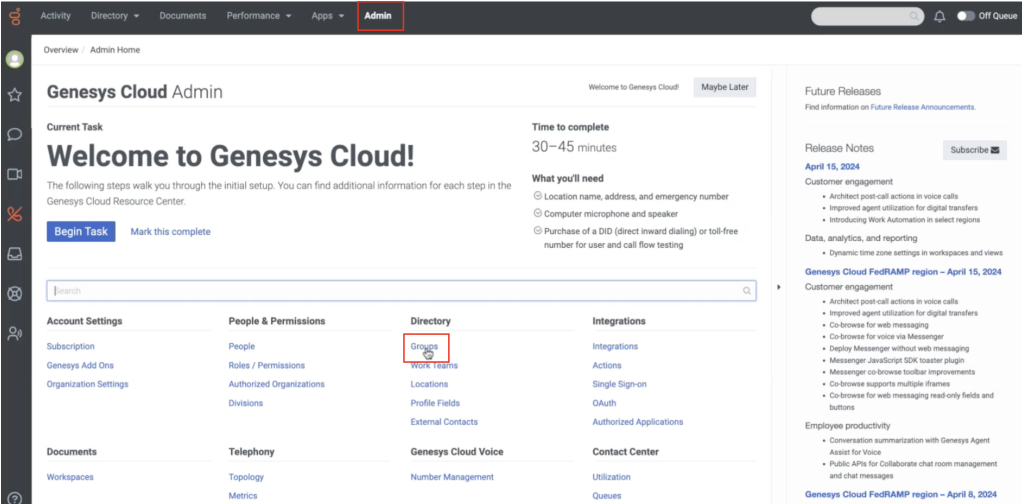
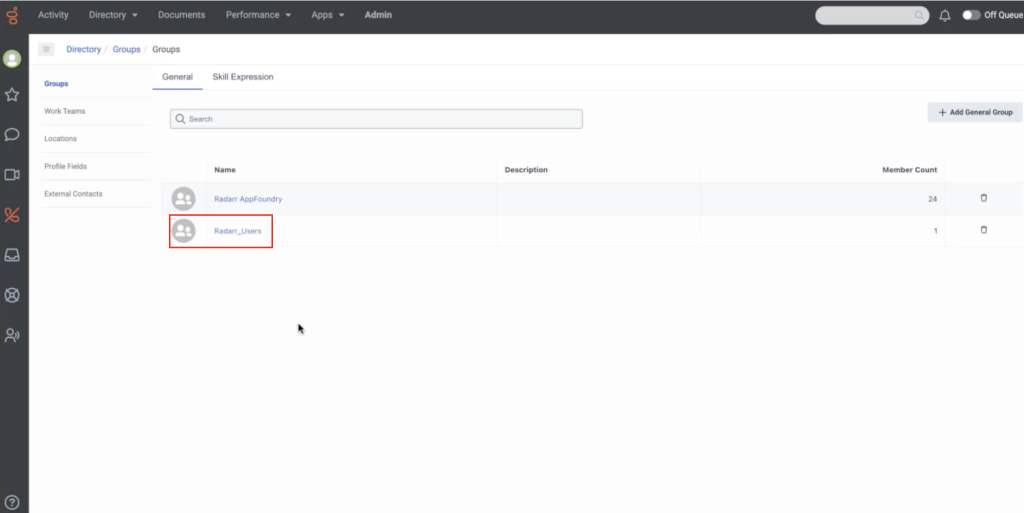
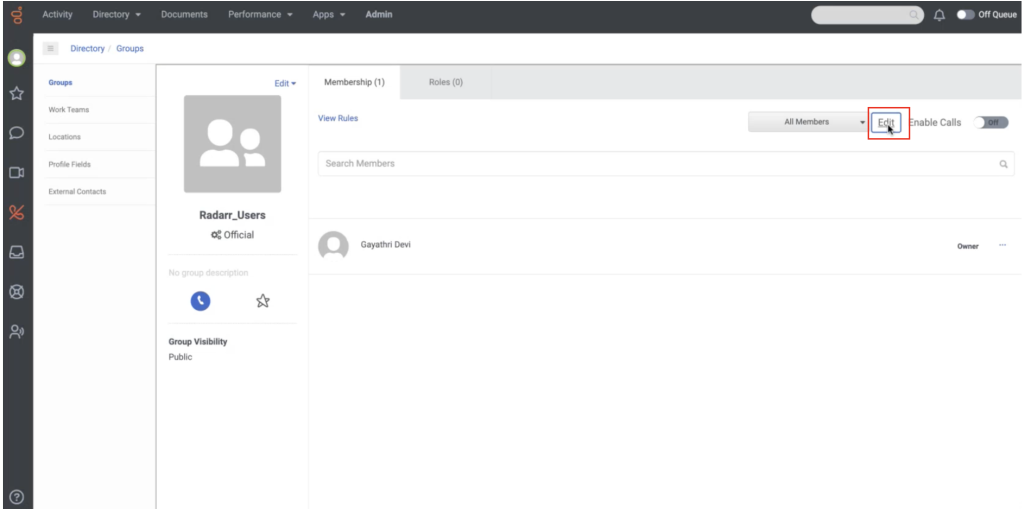
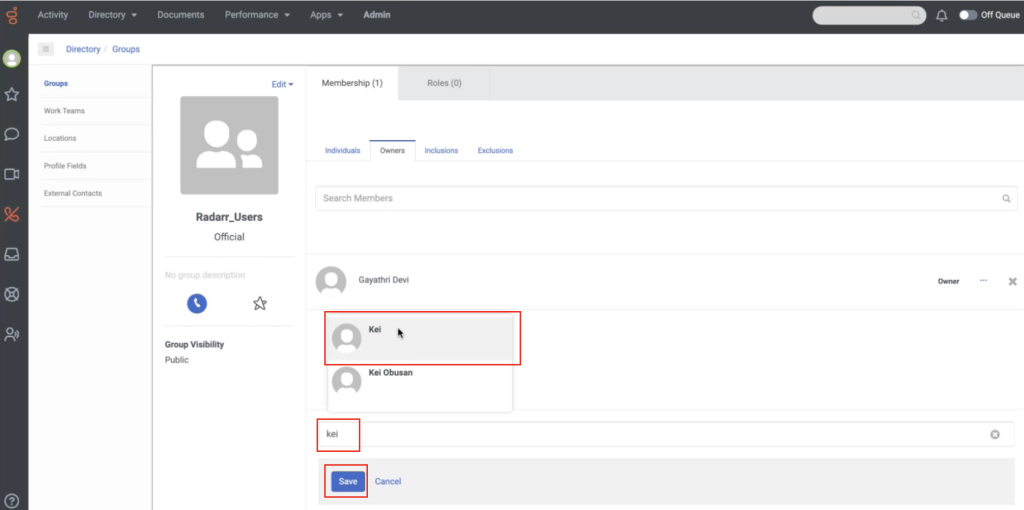
5. After a Genesys Cloud user is added to the “Radarr_Users” group, they need to refresh Genesys Cloud on their browser to see the ”Radarr by Genesys App” under the ”Apps” menu.

6. After clicking on “Radarr by Genesys App”, they will be taken to the app itself, where they will click “Sign In with Genesys” to log in to the app.

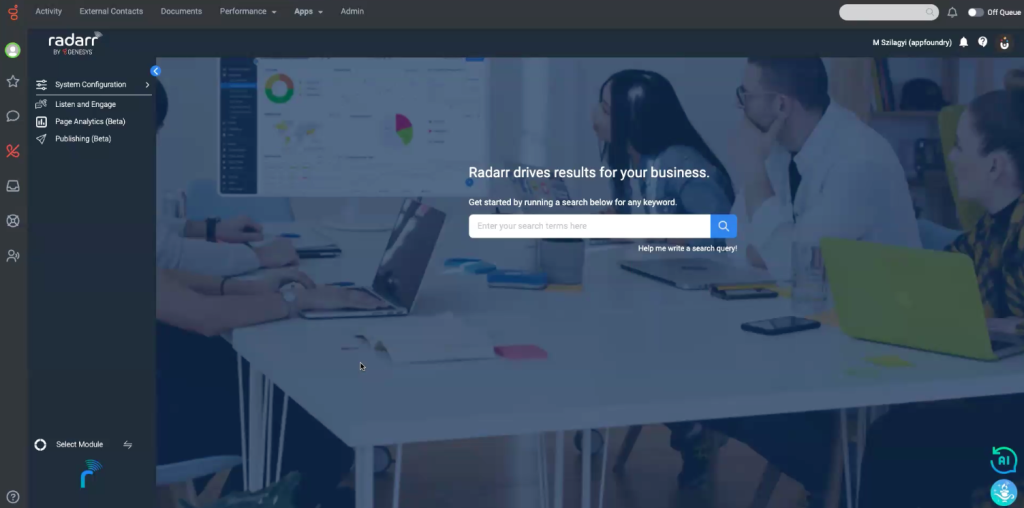
Refer to this article to learn how to change a Radarr by Genesys user’s access type in the app after they have been added.