How do I change a Radarr by Genesys user’s access type in the app?
Upon installing Radarr, the person who installed will automatically get Radarr Admin access, and subsequent users added will have Radarr User access. Refer to this article to know the difference between User and Admin in Radarr by Genesys.
NOTE: A Genesys Cloud user must have access to the “Admin” tab and must also be a Radarr Admin user to add subsequent users and change their user access type within Radarr. The user needs to log in to Radarr by Genesys first before their access type can be changed. Their name won’t show up on the user list if they haven’t logged in yet. This article will guide them on what they need to do when their Radarr by Genesys user account is created. After any of the subsequent users have been made Radarr Admin, they can also change other users’ access type within Radarr.
A. Editing under Listen Settings
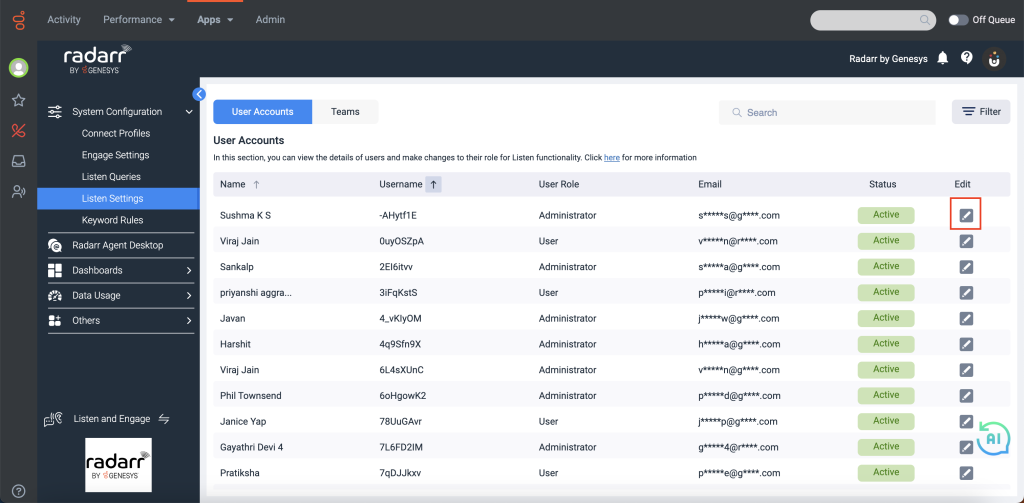
- Go to “System Configuration” > “Listen Settings” > then click on the edit icon on the user that you would like to edit.

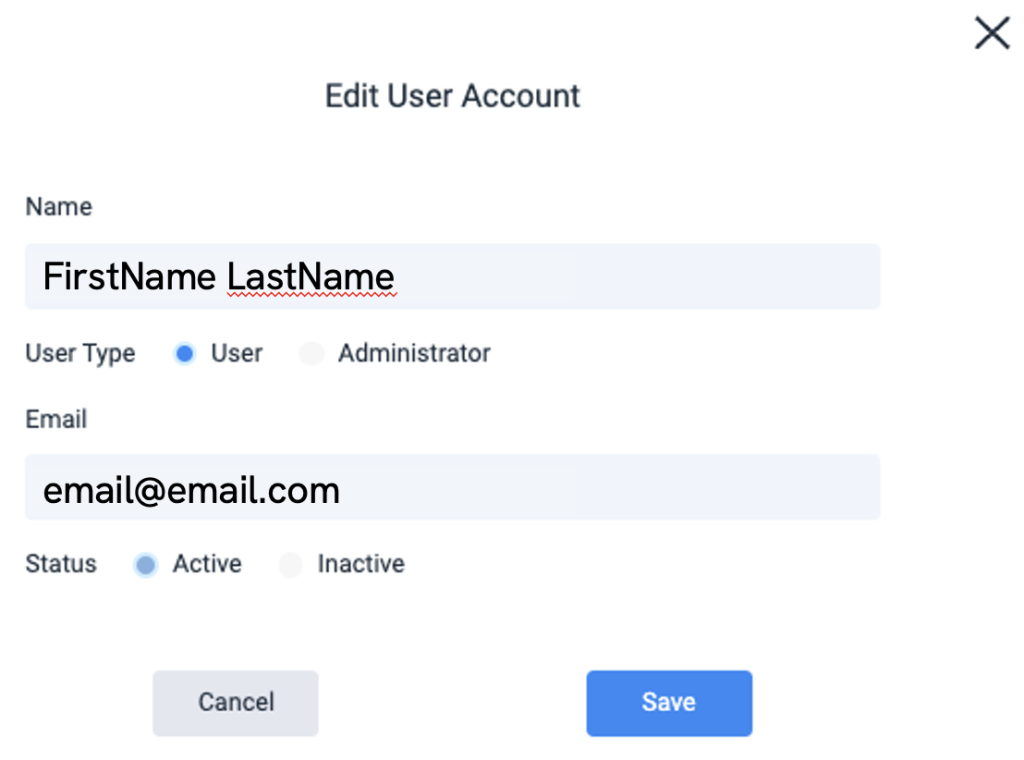
- A pop-up will appear where you can edit their User Type and Status. Click “Save” to apply the changes.

B. Editing under Engage Settings
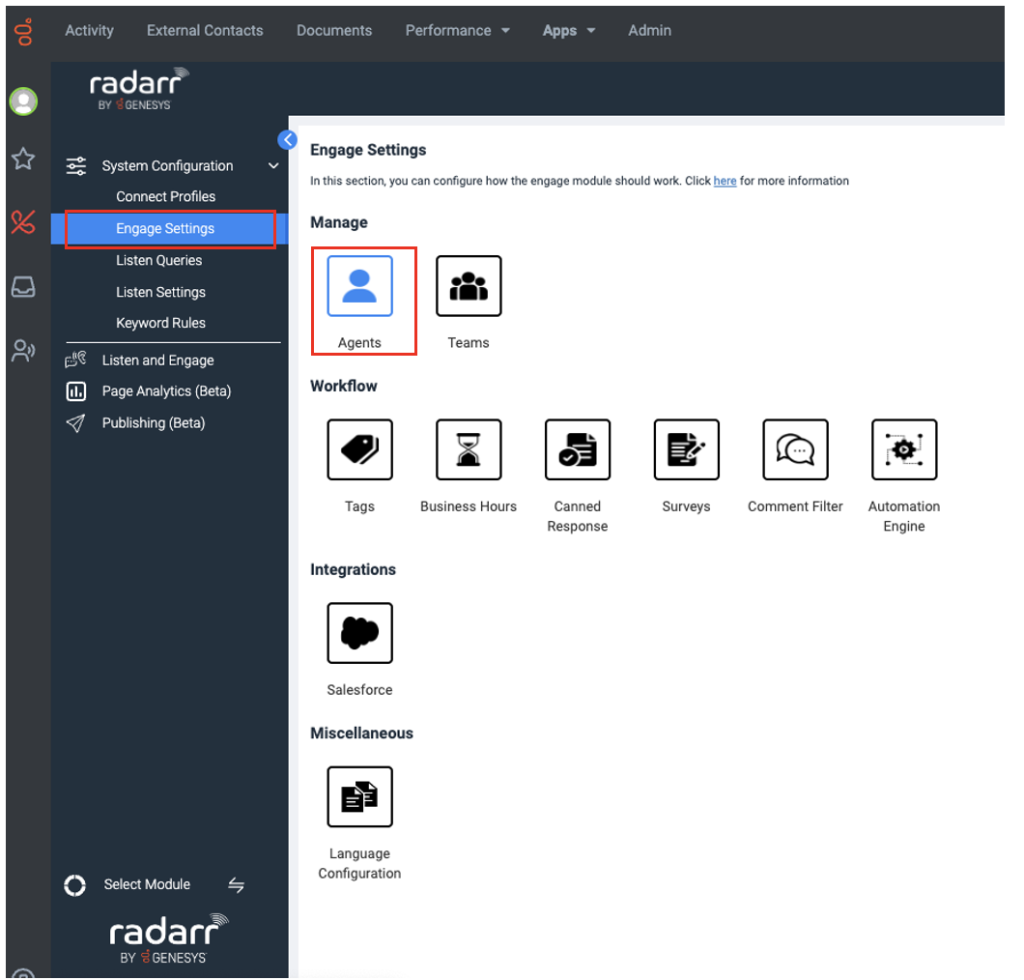
- Go to “System Configuration” > “Engage Settings” > “Agents”.

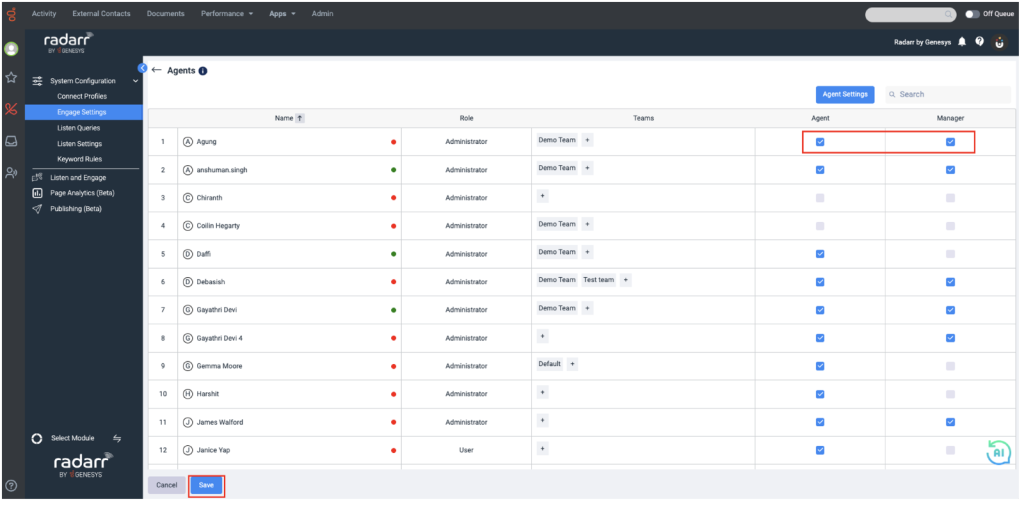
- You can edit the person’s Engage role if they are an Agent or a Manager by ticking the boxes on the right side of the page. Agents can only view the tickets assigned to them in “Radarr Agent Desktop” and their statistics under “Engage Dashboard”. A Manager can view all tickets in “Radarr Agent Desktop” and all Agents’ statistics under “Engage Dashboard”. Click “Save” to apply the changes.
