Google Play Store Integration with Radarr by Genesys
Follow the below steps to add a Google Play Store account to Radarr by Genesys:
- Log in to the Google Play Console.
Note: The app you are trying to add should be available in the list of apps as in the screenshot below.
The image below is an example of connecting the Radarr mobile app on Play Store to the Radarr by Genesys.

2. Copy the app package name which is below the app name and store it as it will be used to add the app to Radarr. In this case, it’s “com.radarr”
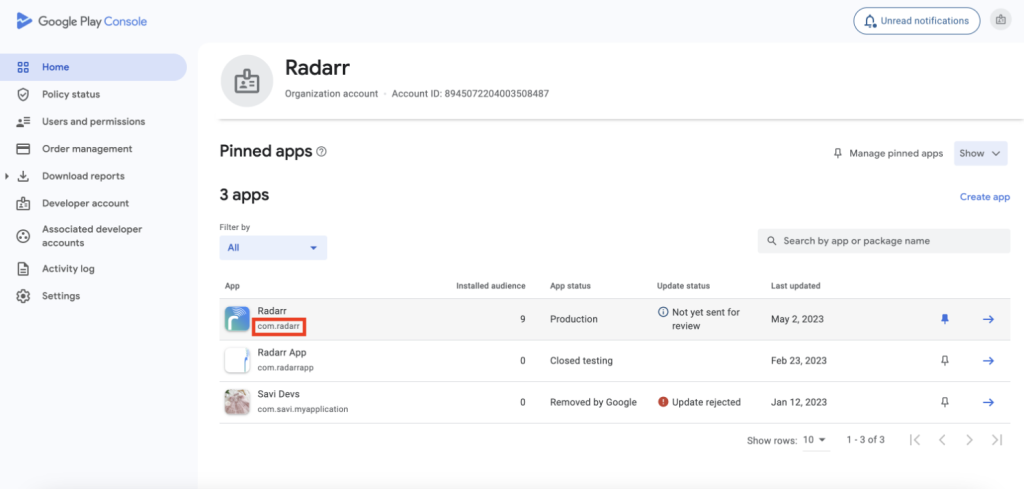
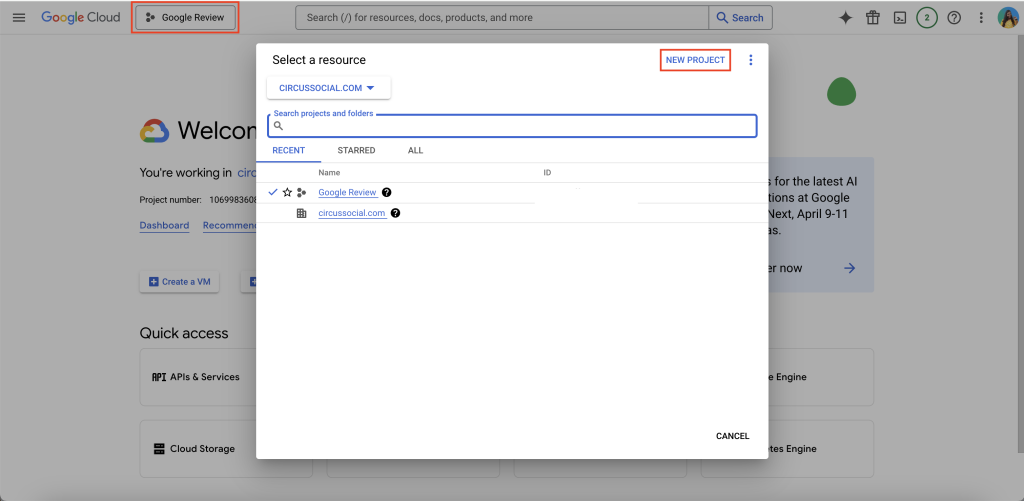
3. Now log in to your Google Cloud account from the same email address click Project name and then click on create
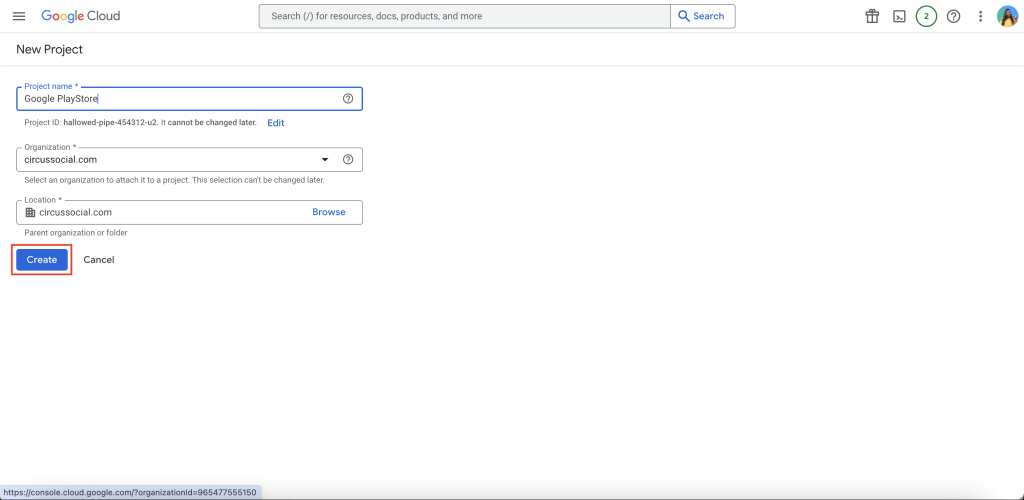
4. Enter the Project name and click on “Create”
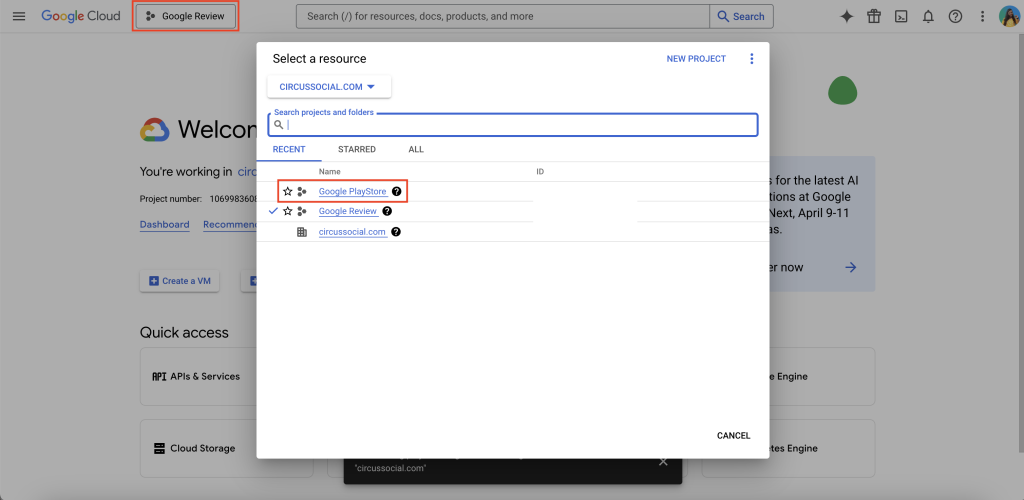
5. Now again click on the projects and select the newly created project
6. Now click on APIs and Services
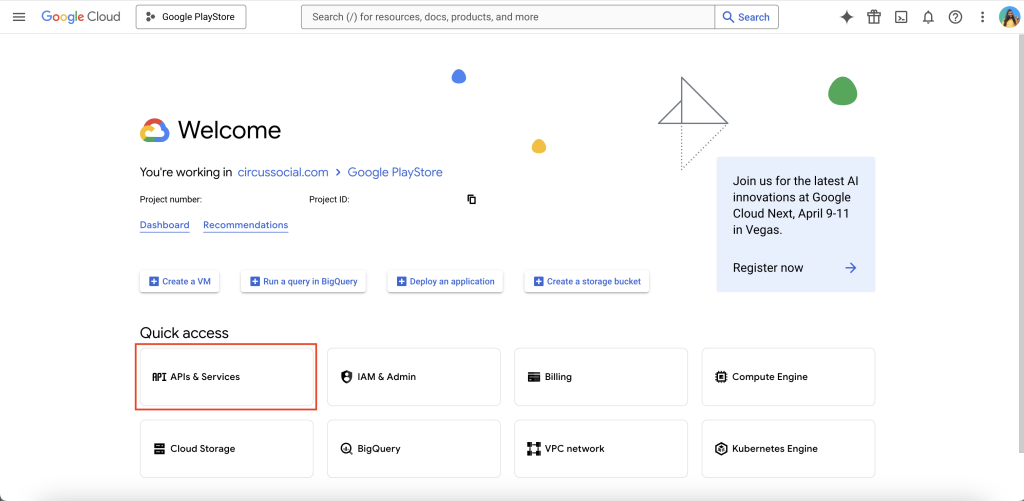
7. Click on “ENABLE APIS AND SERVICES”

8. In the API Library tab, search Google Play Android Developer API and enable it.


Note: The same should be seen as enabled on Google Play Console.

9. Now on the Google Cloud, click on “OAuth consent screen”
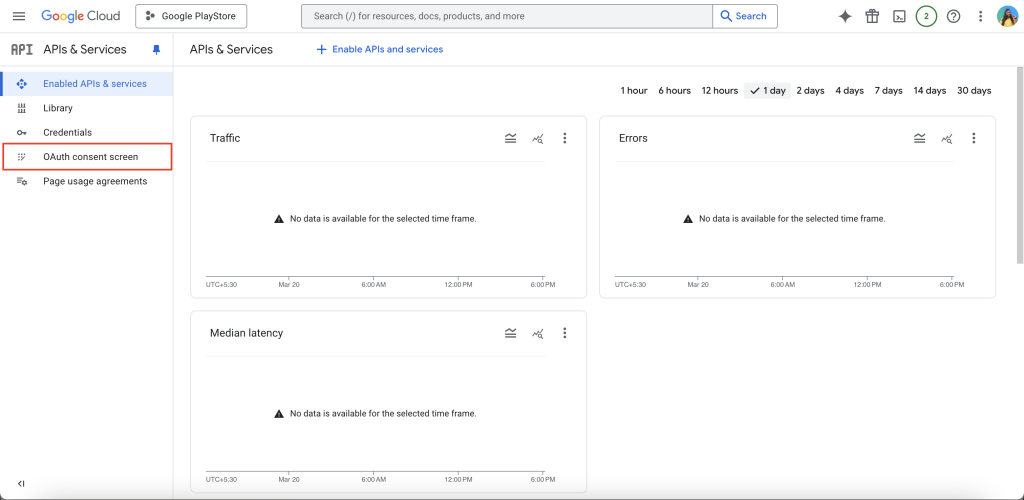
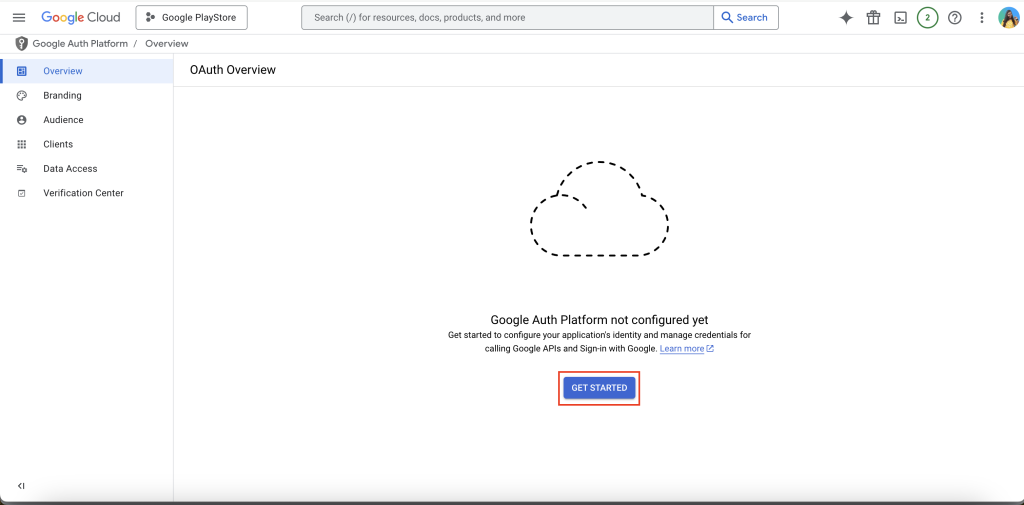
10. Add App information
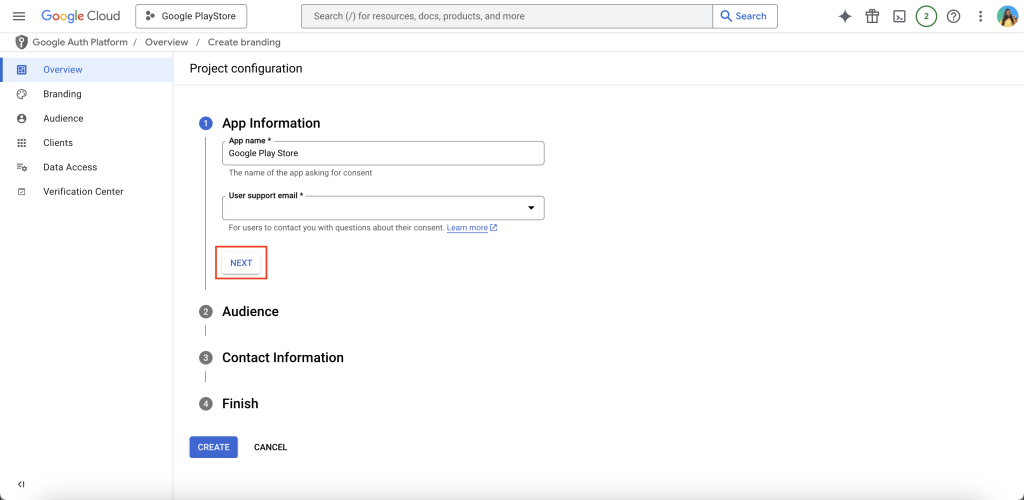
11. Select “Internal” under “Audience”
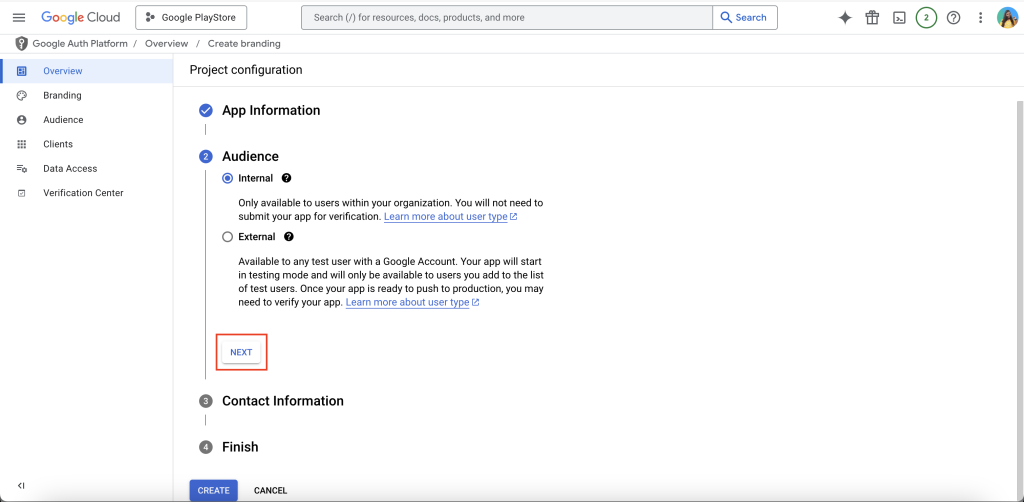
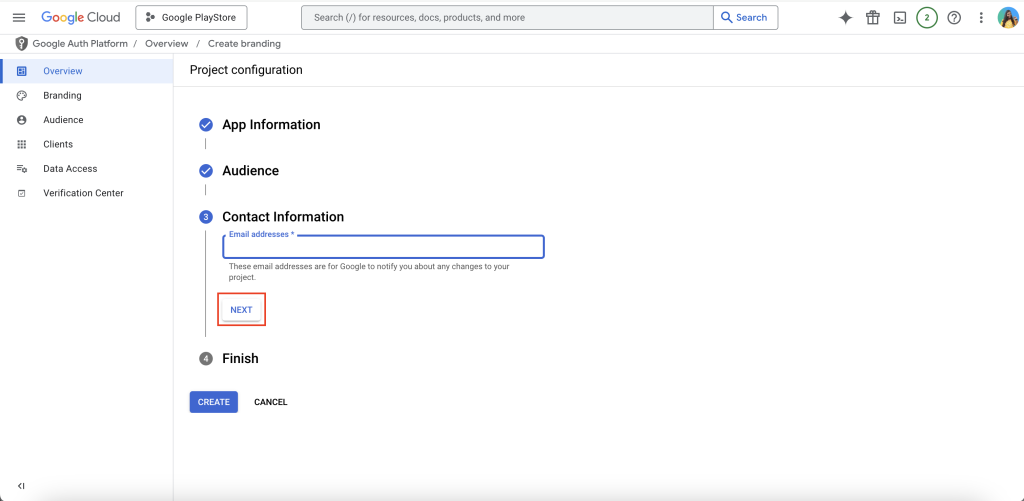
12. Add “Contact Information” and then click on next
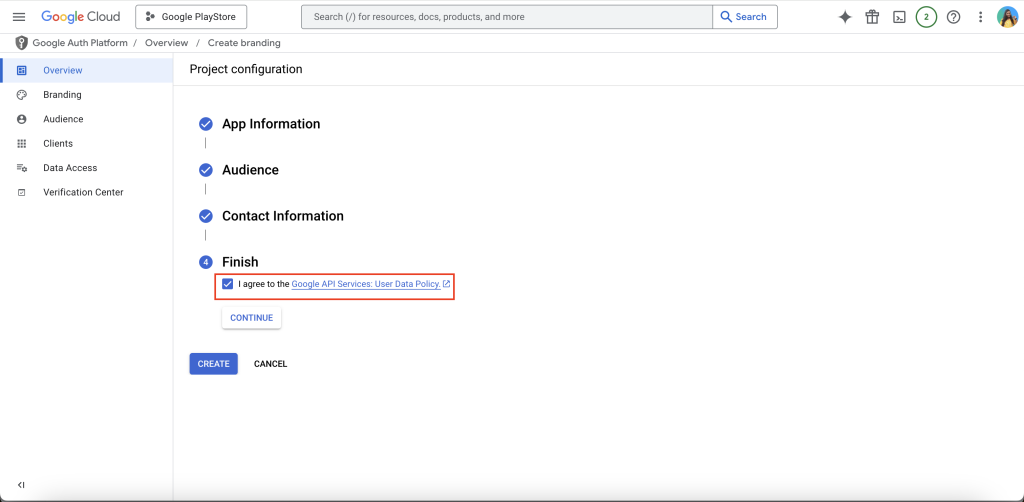
13. Enable “I agree to the Google API Services: User Data Policy” and click on “Continue” and “CREATE”
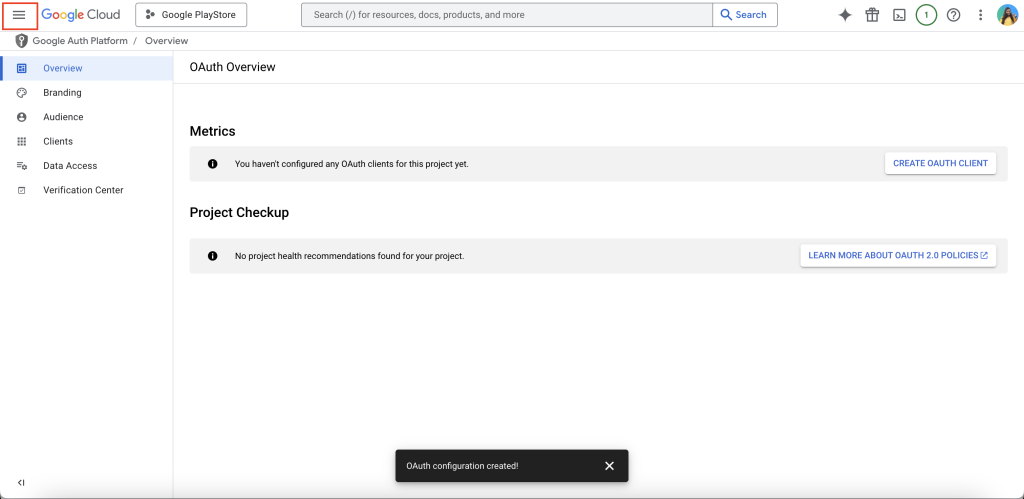
14. Once you have successfully configured OAuth, click on the “Navigation Menu” on the top left corner
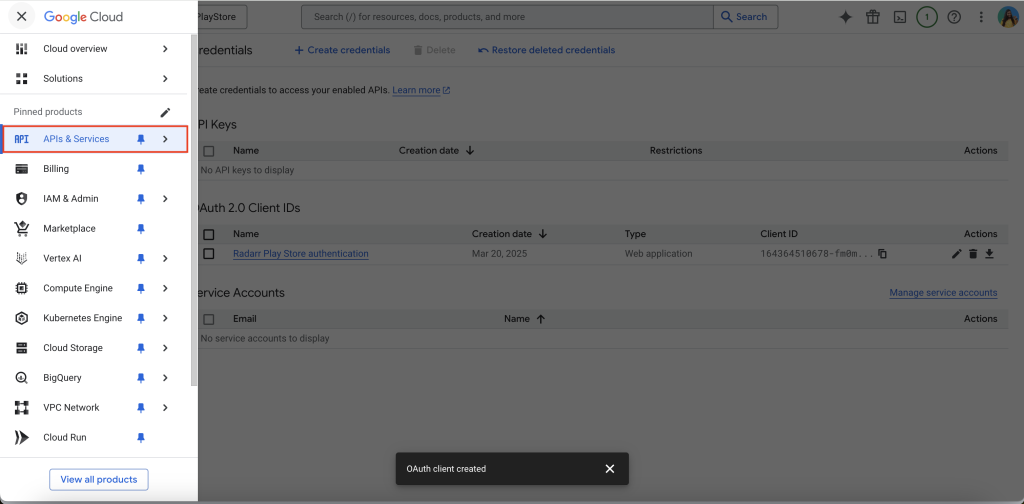
Now to add a Google Play Store account on Radarr by Genesys using OAuth client ID
- Choose APIs & Services
- Choose Credentials
- Click on “CREATE CREDENTIALS” at the top of the screen
- Select OAuth Client ID
- Choose Web Application
- Add “Authorized JavaScript origins” and “Authorized redirect URIs” as “https://appfoundry.radarr.com” as shown in the screen below

After creation, you will see the Client ID and Client Secret on the screen below. You’ll need these when adding the account to Radarr by Genesys. Download the JSON file and keep it accessible, as you may need the Client ID and Client Secret for future authentication as well.
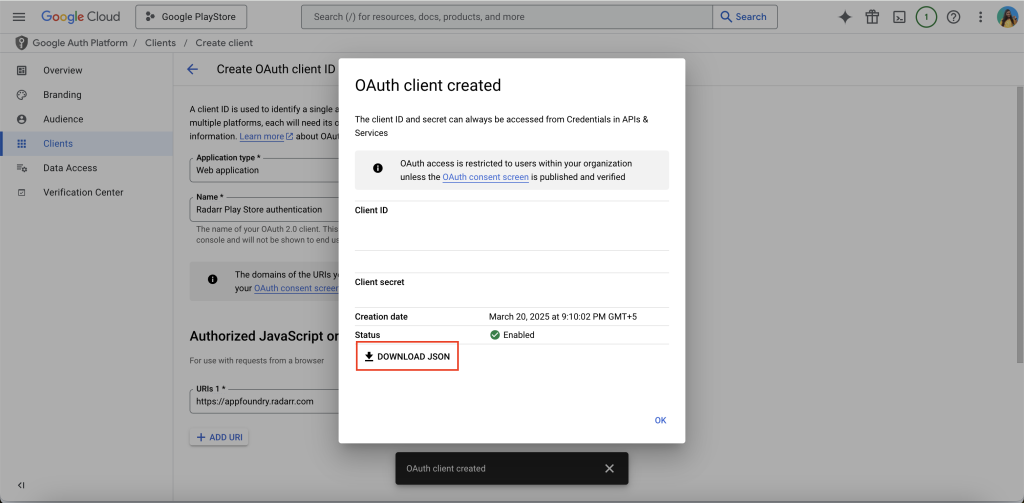
15. Go back to Google Play Console -> Setup -> API access.
Once created, you should see the same in your Google Play Console under OAuth Clients.
Once done follow the “Google Play Store” authentication steps given in this article to authenticate your Play Store account with Radarr by Genesys